In my previous post, I described how to configure an Azure AD App registration to facilitate access to the Microsoft Graph APIs. I also showed you how to call an MS Graph API from Postman and create an APEX Web Credential to access MS Graph APIs from Oracle APEX.
In this post, I will build on that knowledge and provide steps to build an integration between APEX and the Office 365 calendar using the calendar resource. We will create an APEX Calendar Region that directly sources its calendar entries from an Office 365 calendar. This integration is a great way to see someone's availability instantly from an APEX App.
Oh, and did I mention it will only require two lines of code?
Here is a YouTube clip that contains a sneak peek into what the finished calendar will look like. The users and calendar entries are coming directly from Office 365.
There are many other calendar-related MS Graph APIs available that enable you to do the following directly from an APEX App:
- Create, Update and Delete Calendar Entries for a User
- Get availability times getSchedule for a user or group of users
- Get suggested meeting times findMeetingTimes for a user or group of users
Azure AD Configuration
Follow the steps from my APEX & Office 365 Integration - Introduction post to see how to create an AD App registration using 'Microsoft Entra'. Once you have an App registration, complete the following steps from within the AD App registration:
- Navigate to 'API permissions' and click Click '+ Add a permission'
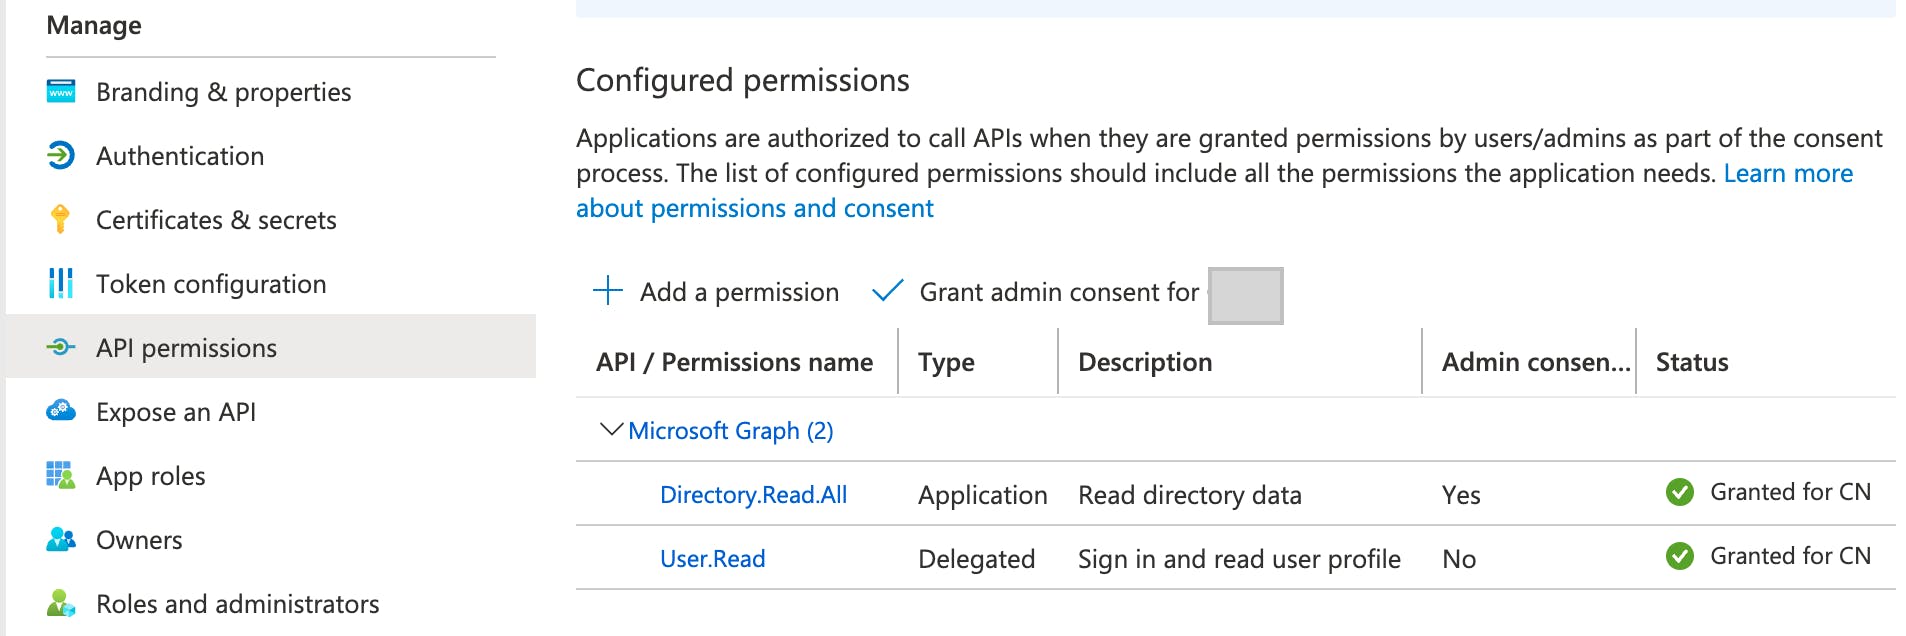
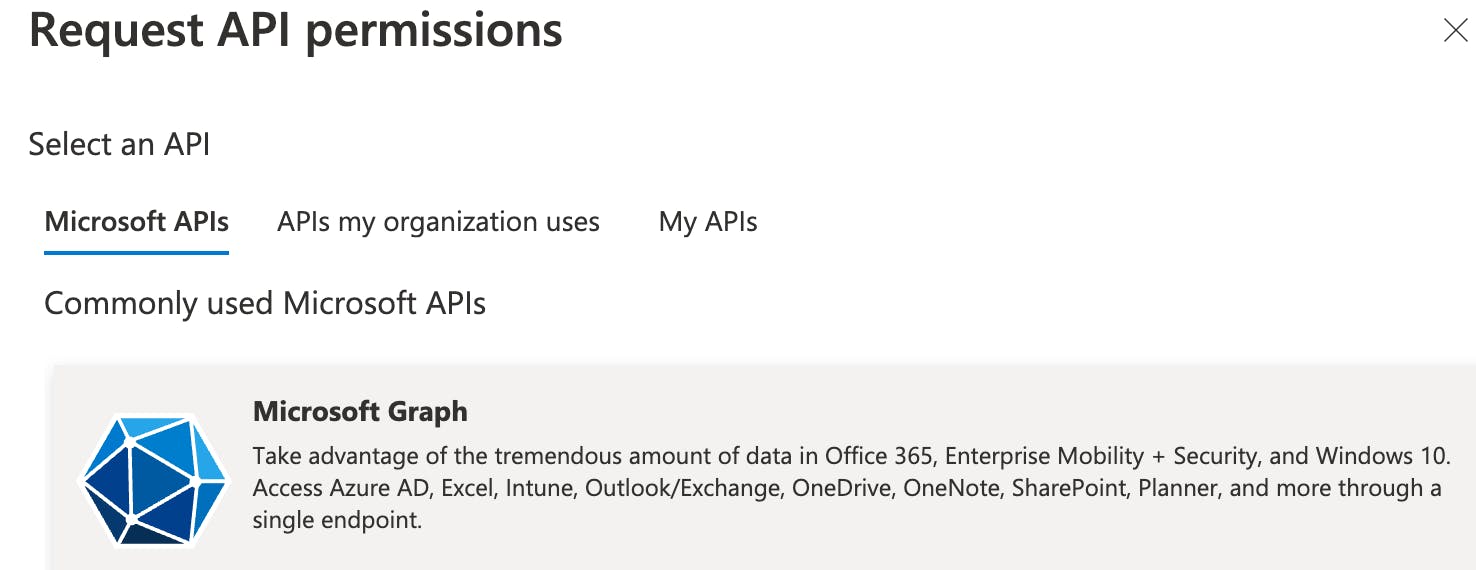
- Click 'Microsoft Graph' then Click 'Application Permissions'
- Search for and select
Calendars.Read, then click 'Add permissions'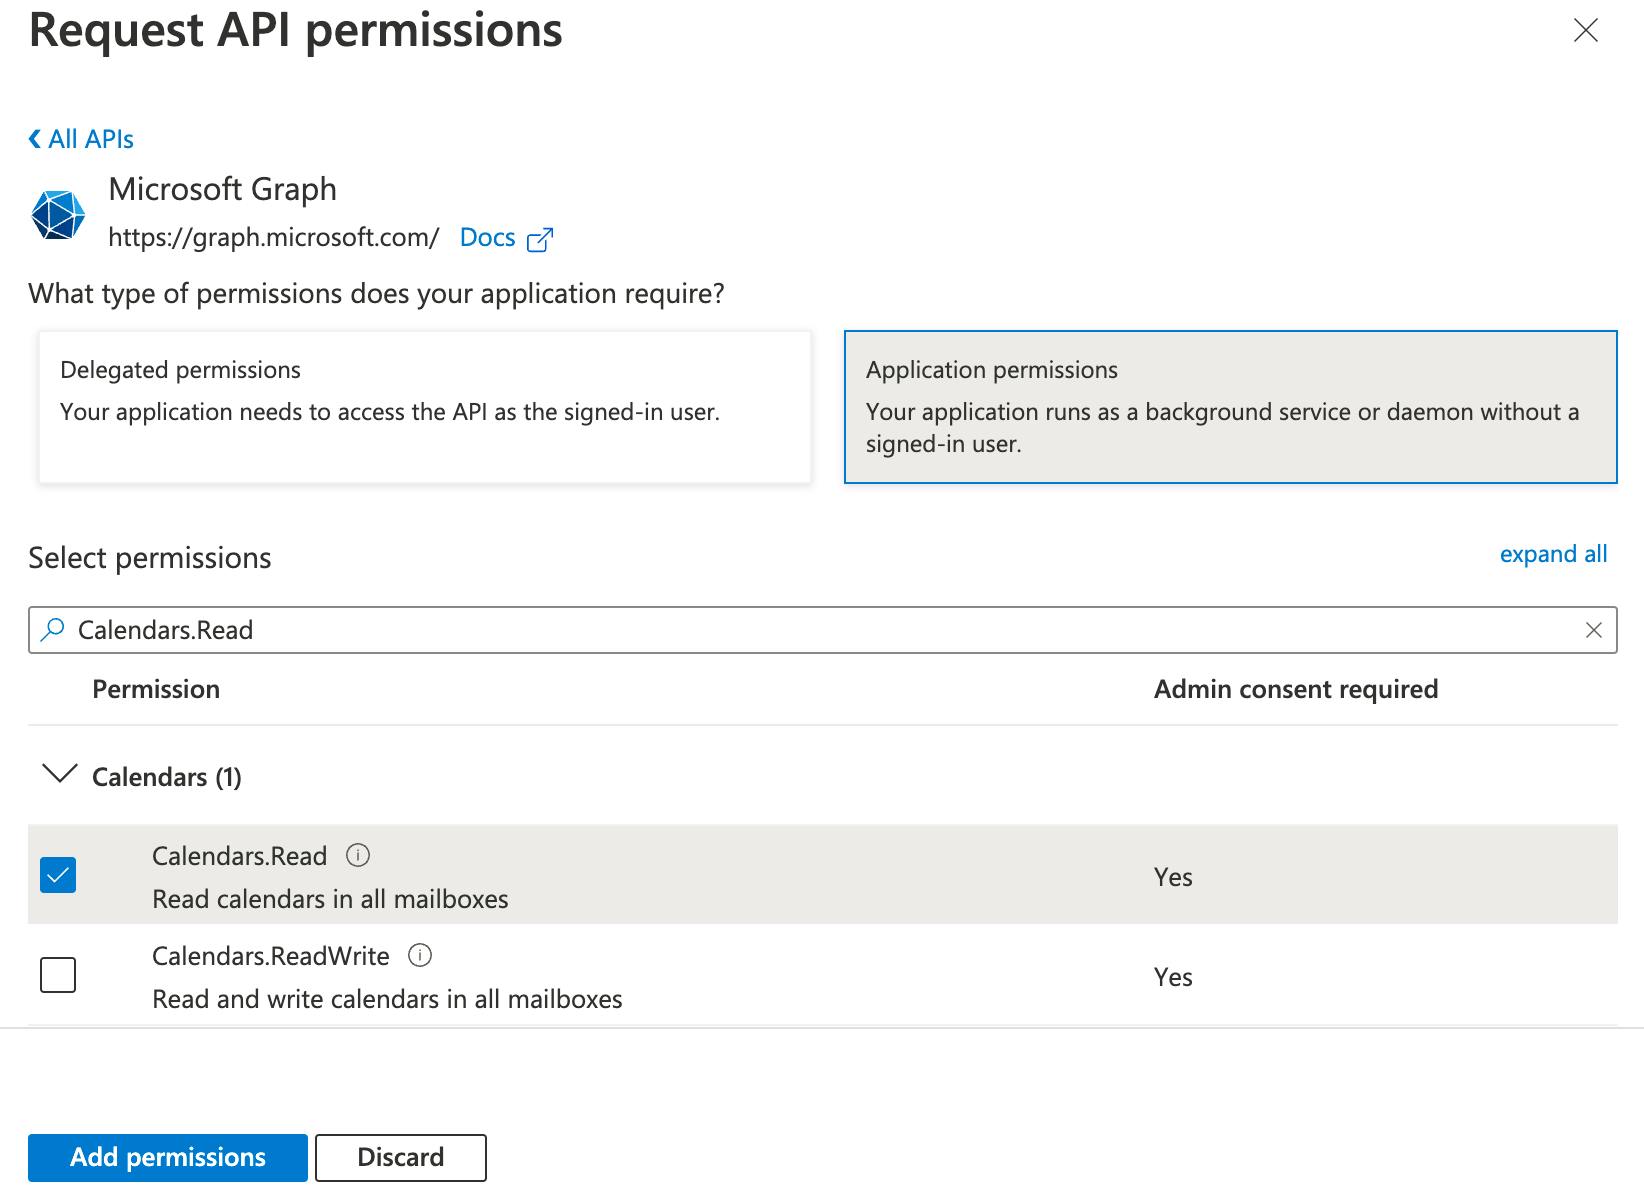
- Click 'Grant admin consent for XX', where 'XX' is your Microsoft Tenant
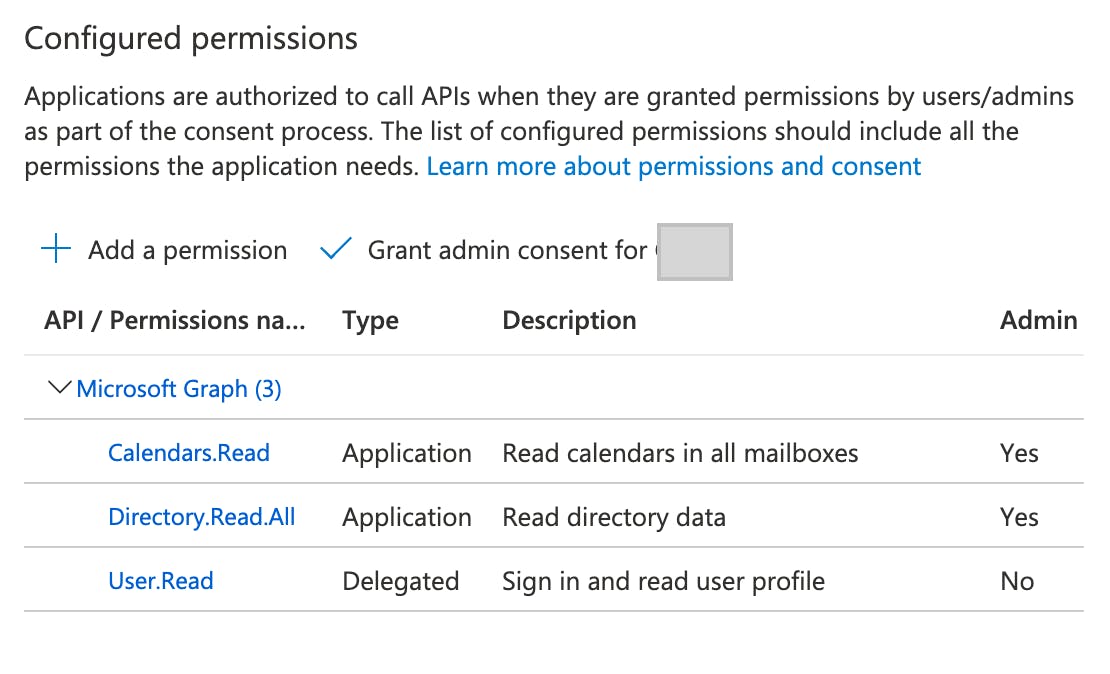
- You should see a green check against the
Calendars.Readpermission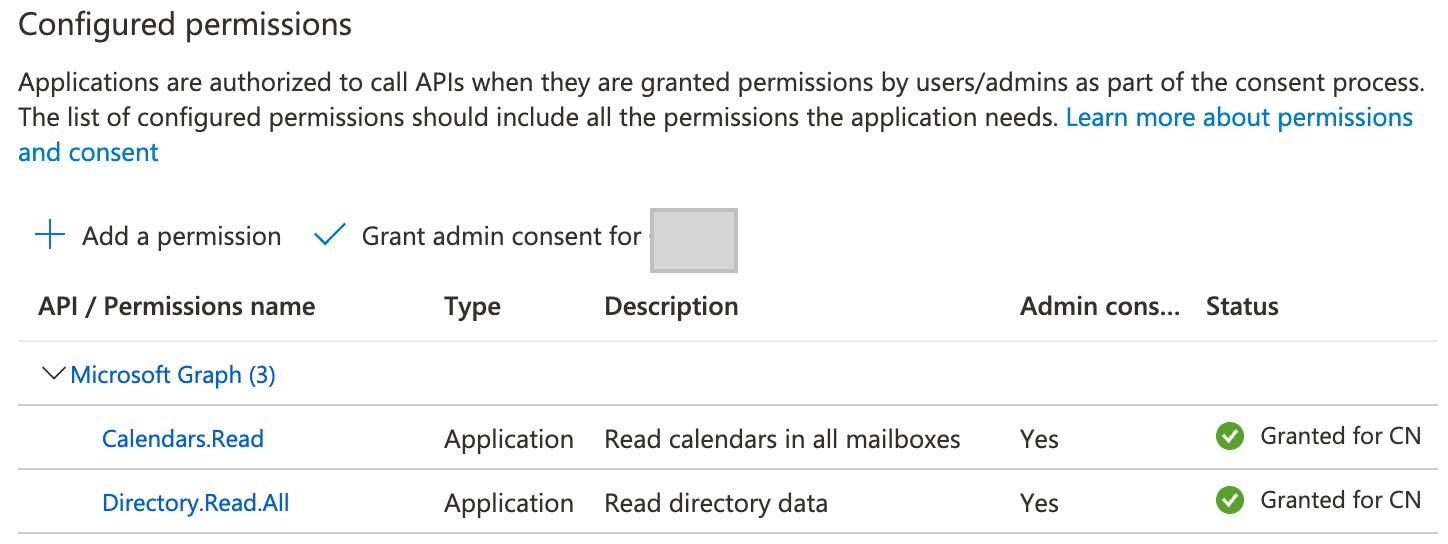
Test the API with Postman
The first step is to test calling the Calendar Graph APIs from Postman.
MS Graph API Access Token
Please refer to my APEX & Office 365 Integration - Introduction post for details on obtaining an MS Graph token using Postman. The token returned from this step will be used as a Bearer Token in the following steps.
Default Calendar Events API
📖 Documentation for the calendar Graph API can be found here.
An MS Office user could have more than one calendar, in which case, you can get a list of all their calendars using the list calendars resource.
For my example, I will get events for a user's default calendar. To identify which user's calendar, we can use their user id or their userPrincipalName (typically their email address). Refer to this post to get a list of users (including their id or their userPrincipalName) for your MS office 365 Tenant.
Endpoint URL
The Endpoint URL for the calendar events API is:
GET /users/{id | userPrincipalName}/calendar/events
e.g. https://graph.microsoft.com/v1.0/users/jon@cloudnueva.com/calendar/events
Postman Screenshots
The screenshot below shows what the Parameters section looks like in Postman.
- MS Graph APIs allow you to provide filters via the
$filterparameter and to select which columns you want to be returned via the$selectparameter. - I encourage you to use both of these parameters as they will help improve performance by keeping the size of the payload down.
- Here is a link to the documentation. See my post for more details on improving performance when consuming REST services from APEX.
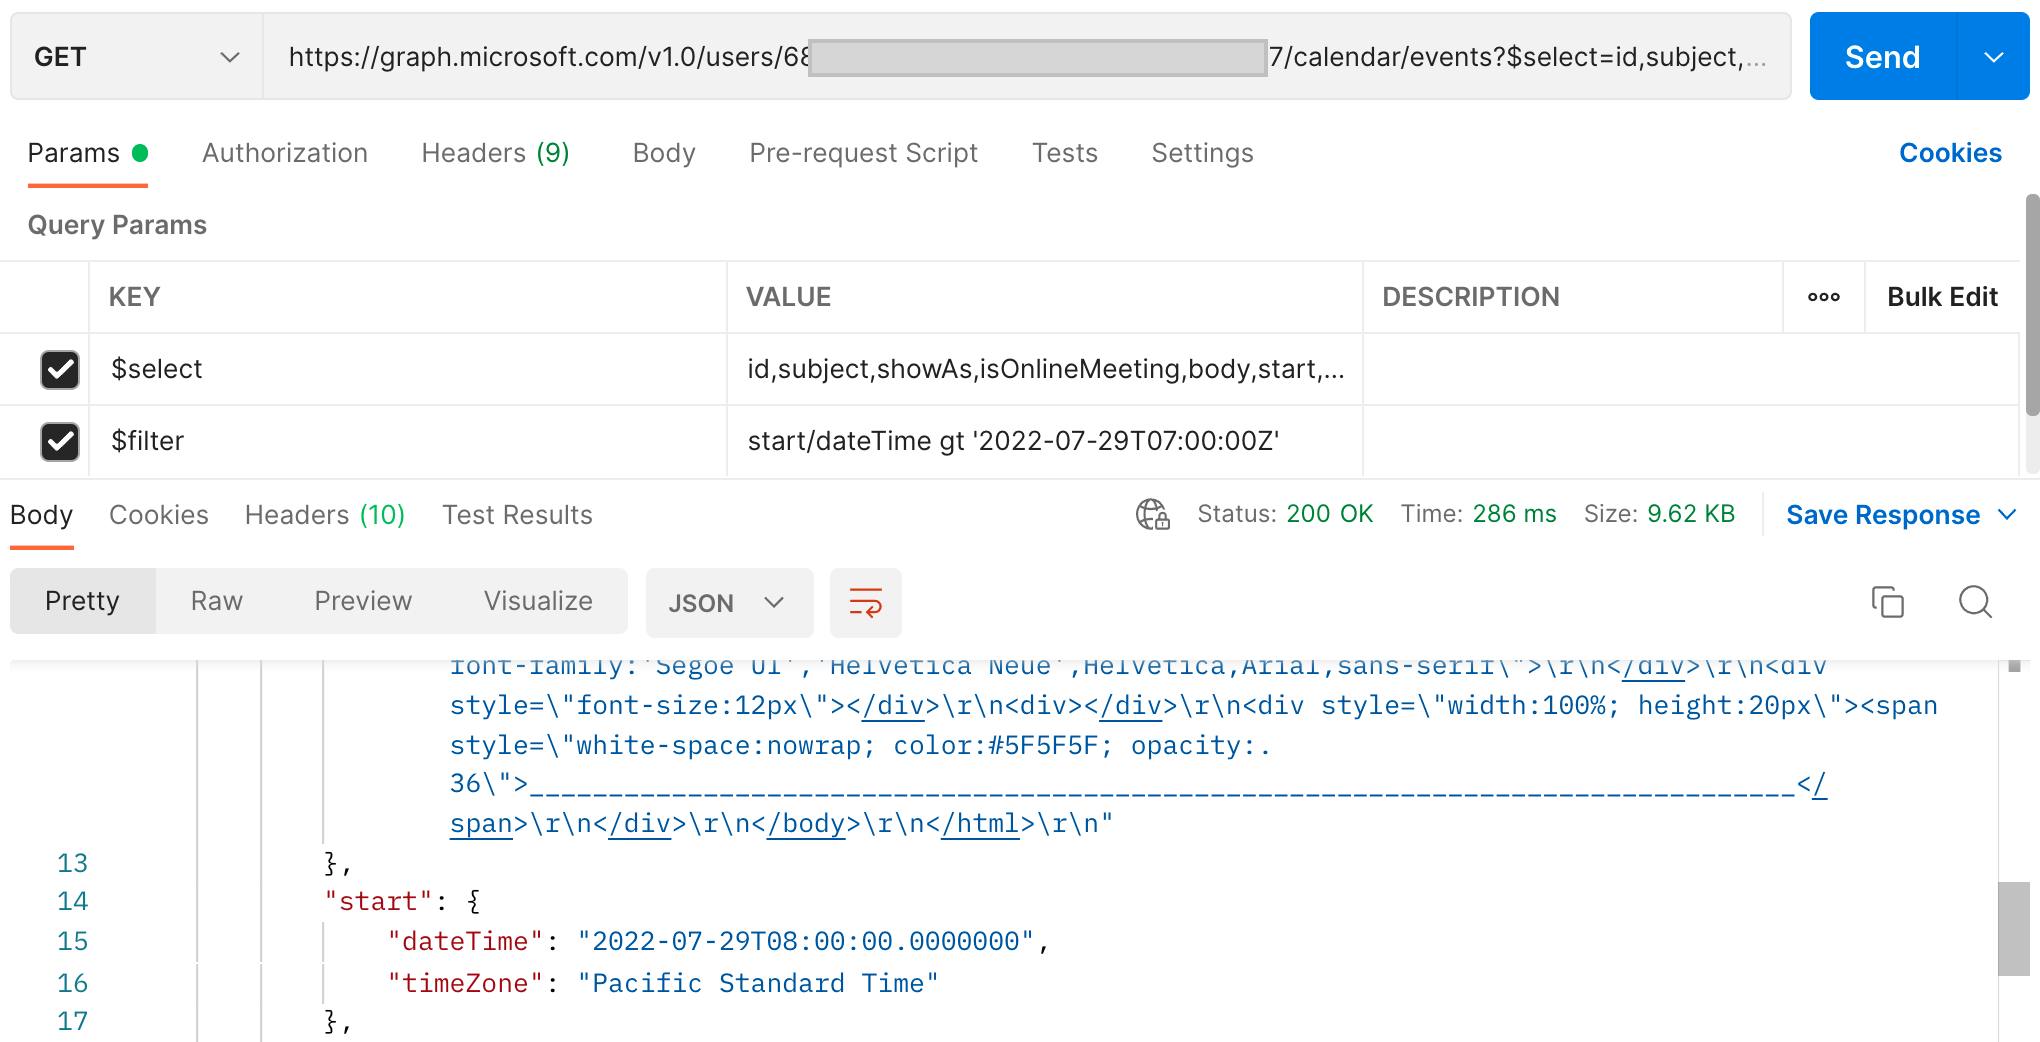 In this screenshot, we see the MS Graph API token being passed as a 'Bearer Token'
 In this screenshot, we see the HTTP headers. The
 Preferheader indicates that I want the dates and times for calendar entries to come back in the 'Pacific Standard Time' timezone. If you do not provide a value, dates and times will be returned in the 'UTC' timezone.
Sample Response
Here is a link to a sample response that includes all available fields.
APEX Configuration
Now that we understand how the Graph API works, it is time to integrate it with APEX. We are going to use APEX REST Sources to do the heavy lifting. If you need more control, you can use APEX_WEB_SERVICE to get the JSON response and use PL/SQL to parse and process it.
This post will focus on creating a REST Data Source to get calendar entries for a user's default calendar.
Demo Application
Refer to the demo application available from my GitHub Repository for the complete code.❗When you install the demo application, you will be prompted with the following:
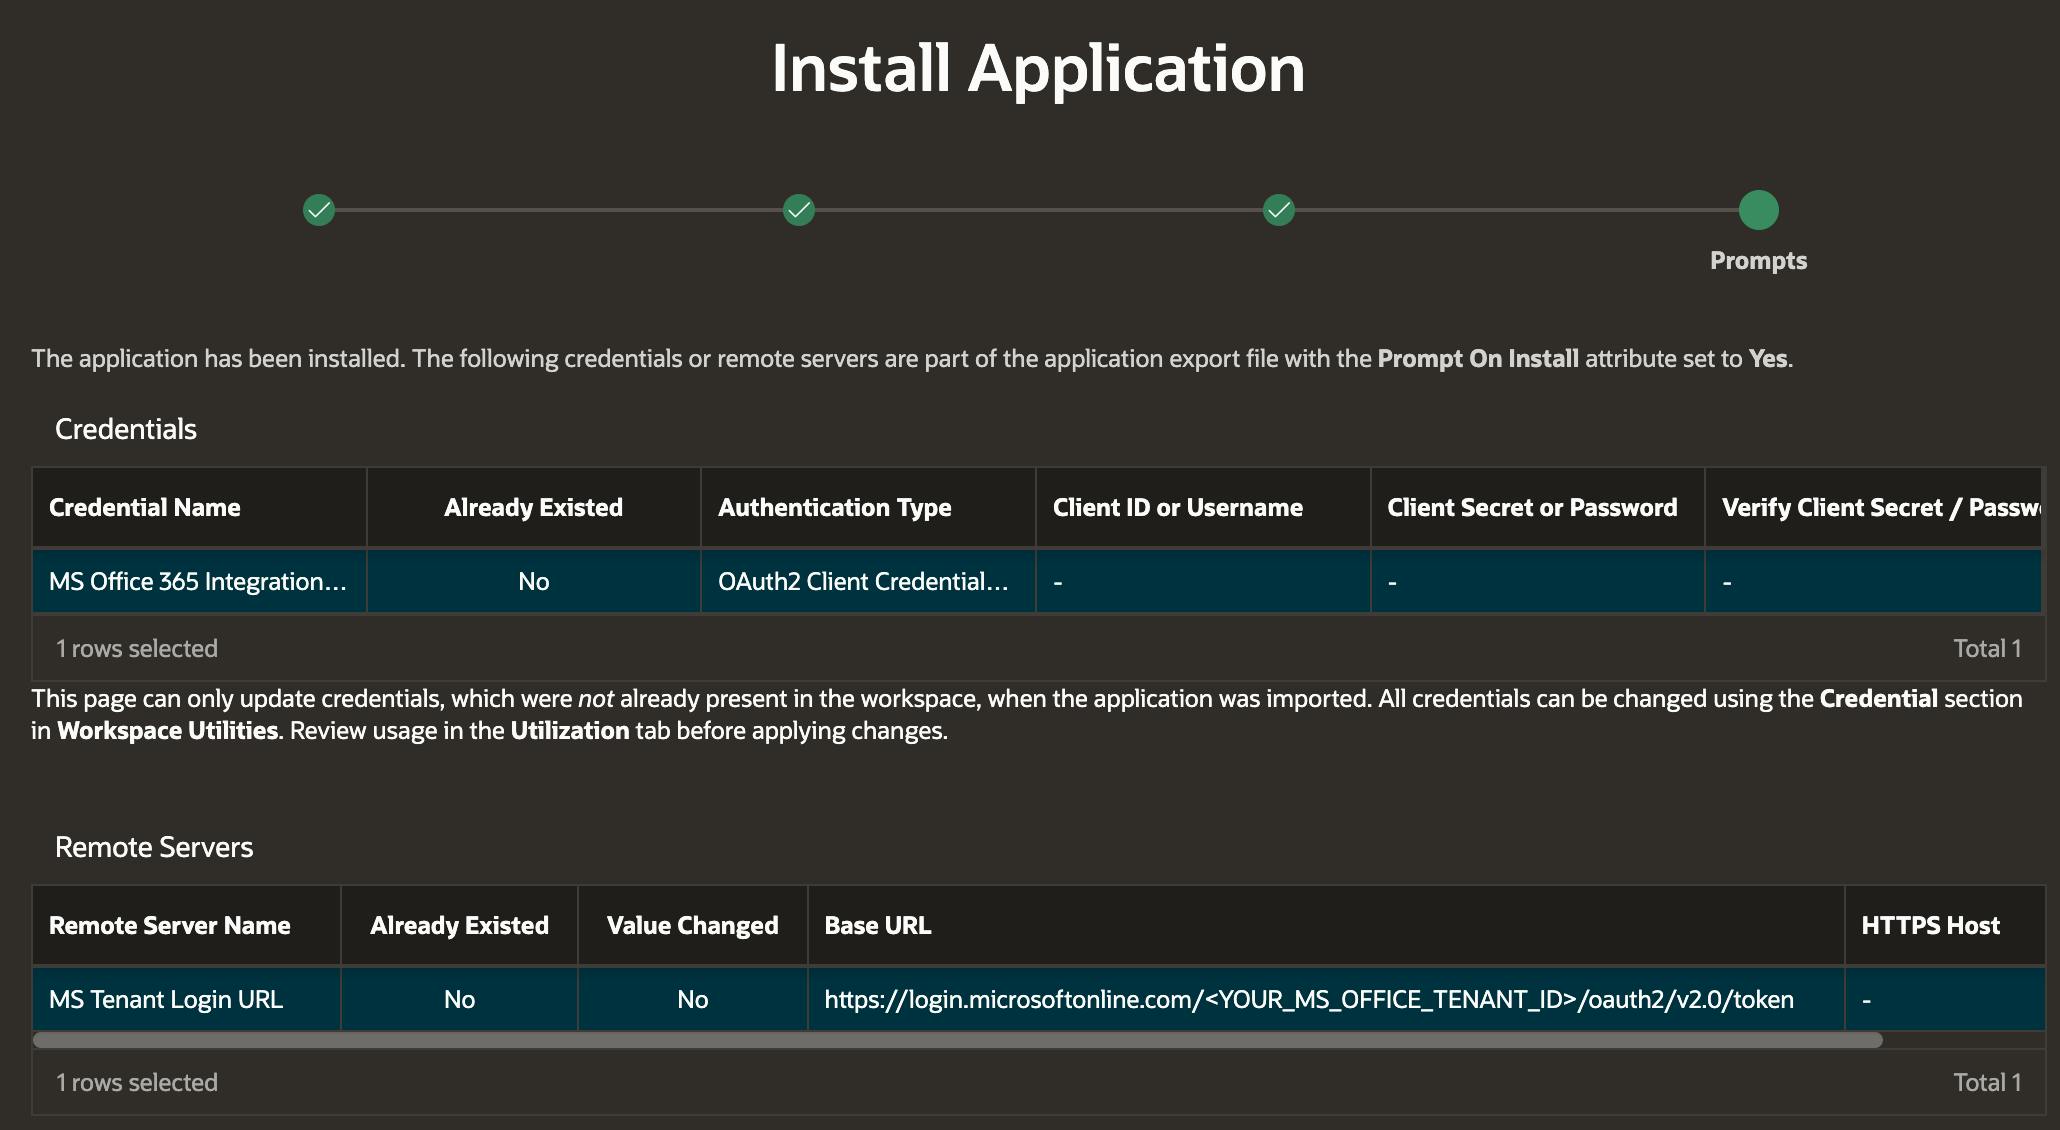
- Enter the client id and secret for your Microsoft AD App registration above
- For 'MS Tenant Login URL', change the text
<YOUR_MS_OFFICE_TENANT_ID>to your Microsoft Tenant ID.
You will also need to update the column option_value for the option_code = TENANT_ID in the table 'CN_MS_GRAPH_OPTS' to your MS Office 365 Tenant ID.
APEX Web Credential
If you do not already have a Web Credential created from the first post, you will need to create one now. ❗The Web Credential must refer to an MS Azure AD App registration with the Calendars.Read permission described above.
REST Data Source
Follow these steps to create a REST Data Source which fetches calendar entries for a given user's default calendar.
- Login to APEX Application Builder
- 🧭 Application > Shared Components > REST Data Sources > Click 'Create'
- Select 'From Scratch' then click 'Next'
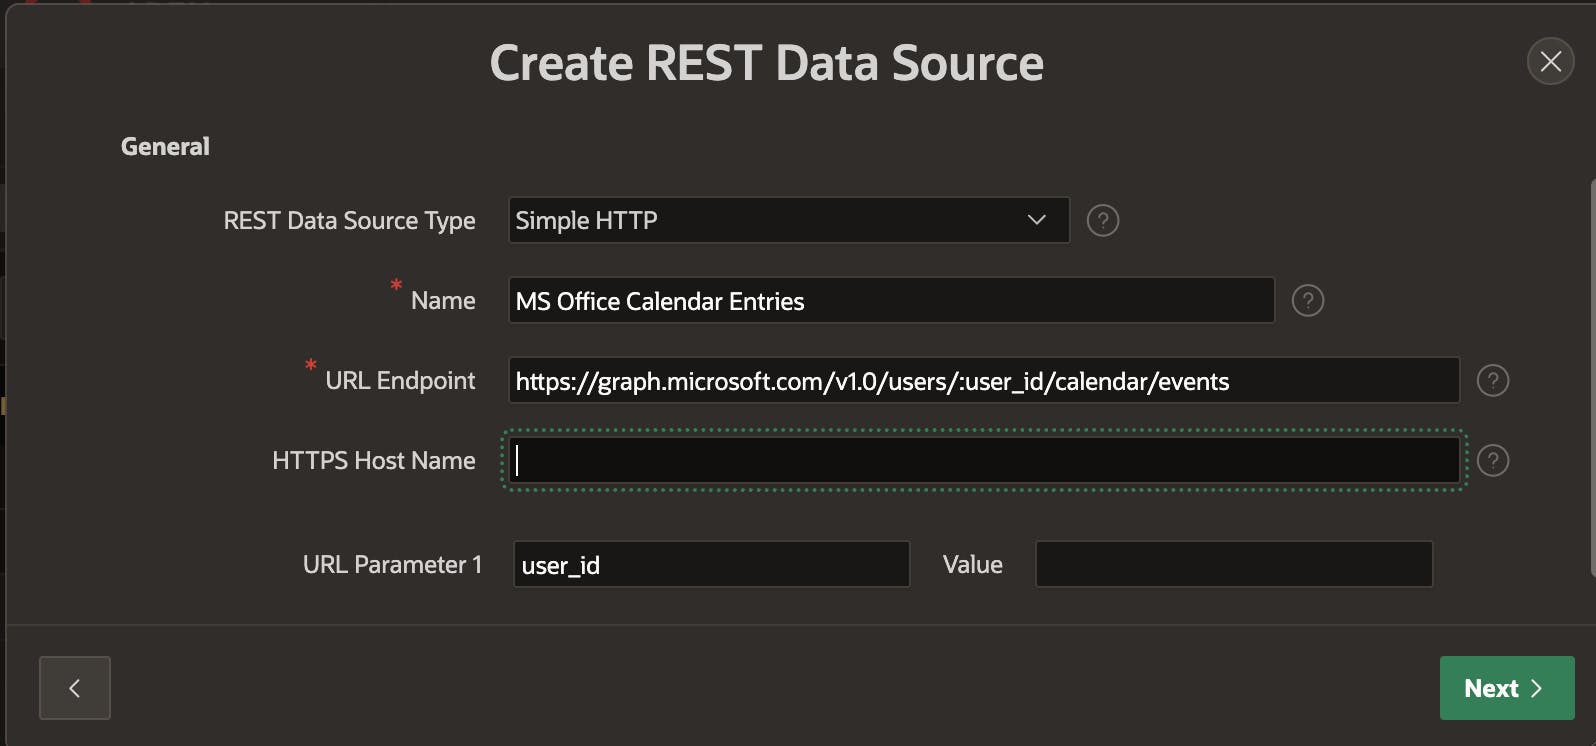
- Enter the below details, including the MS Graph calendar events endpoint URL
https://graph.microsoft.com/v1.0/users/:user_id/calendar/events.- Notice I included a variable
:user_Id, which we will use the inject theidof the user whose calendar we want to view. - We can also provide the
userPrincipalNamein this variable. While creating the REST source I entered a default value of my email address. - Click 'Next' once you have entered these values
- Notice I included a variable
- Click 'Next' twice more until you see the below page
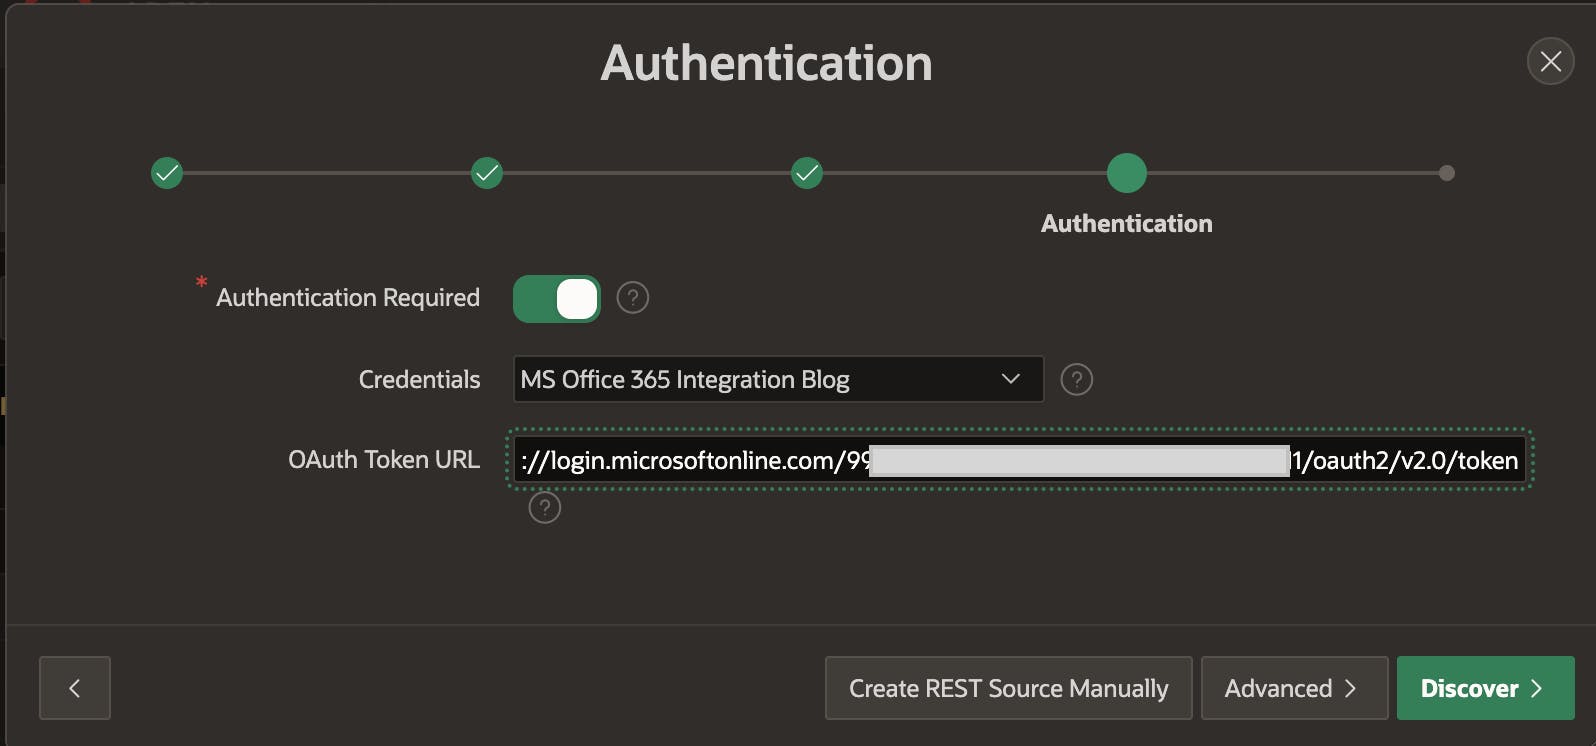
- Select the Web Credential you created in the previous steps
- Enter the following token URL
https://login.microsoftonline.com/<TENANT_ID>/oauth2/v2.0/token. Where<TENANT_ID>is your MS Office 365 Tenant ID - Click 'Create REST Source Manually'. ❗At this stage, clicking 'Discover' will not work
- Select the newly created REST Source, then click the 'Edit Data Profile' button
- Change the value of 'Row Selector' from
itemstovalue
- In the same modal window, scroll down and click the 'Rediscover Data Profile' button

- Click 'Replace Data Profile', then 'Apply Changes'
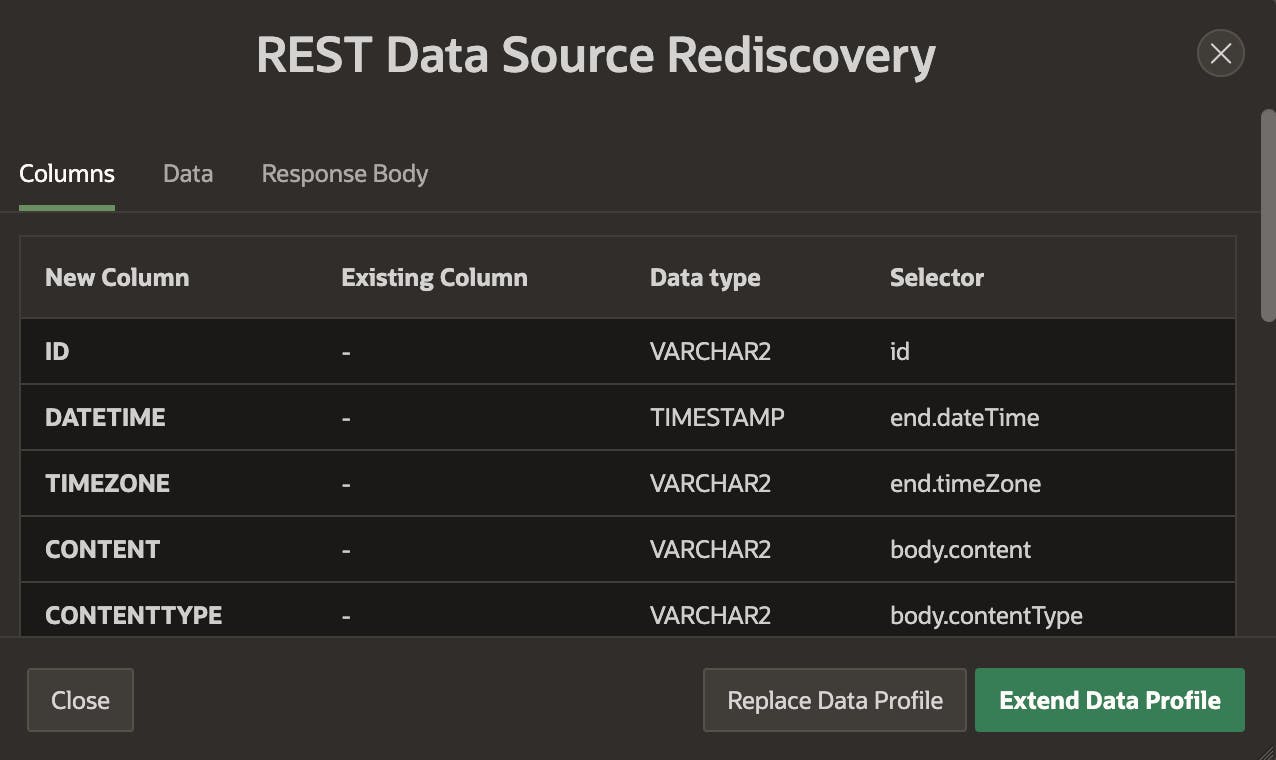
- Click Edit Data Profile Again, then change the 'Name' field for the 'Selectors'
end.dateTimeandstart.dateTime. Doing this will make finding these columns easier when we create the APEX Calendar Region
- Finally, change the
user_idparameter to be required, and add the two additional Parameters$filterand$selectas shown in the below screenshot
That completes the setup of the REST Data Source.
APEX Calendar Region
The final step is to create a calendar region that uses the REST Data Source to fetch the calendar entries from MS Office.
- 🧭 Login to APEX Application Builder and create a new blank page
- Create a new Region per the below screenshot
- Note the parameters
$filteranduser_idshould be displayed automatically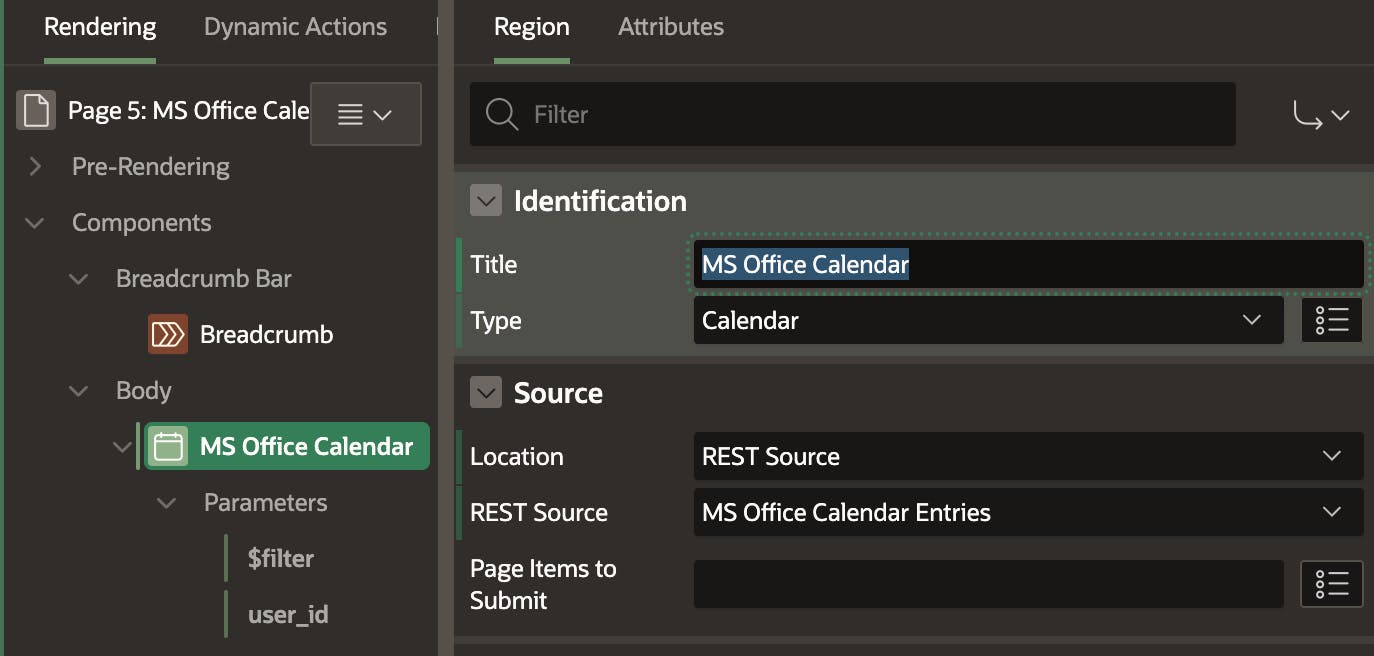
- Note the parameters
- Enter the below details in the 'Attributes' section of the region
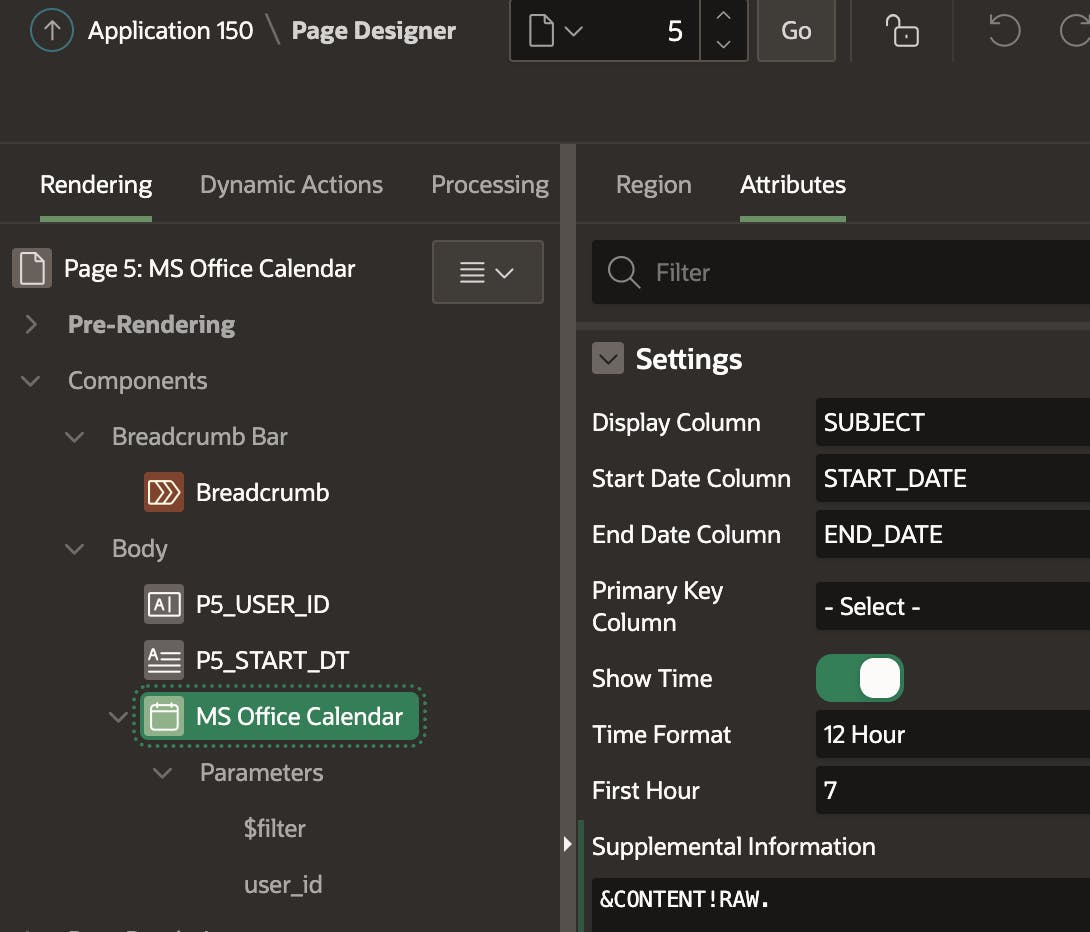
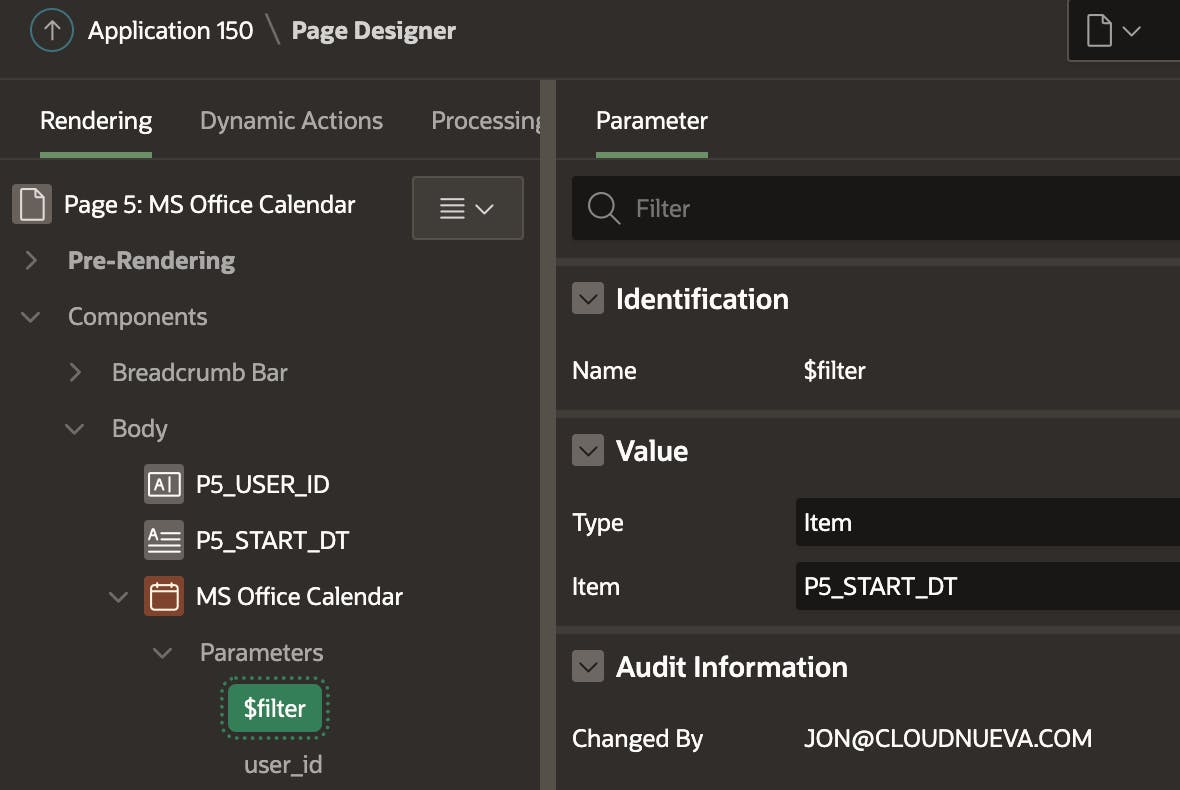
- Link the two REST Source Parameters to APEX Page Items
- Create two page items
P5_USER_IDandP5_START_DT - Link these page items to their respective parameters e.g.
- Create two page items
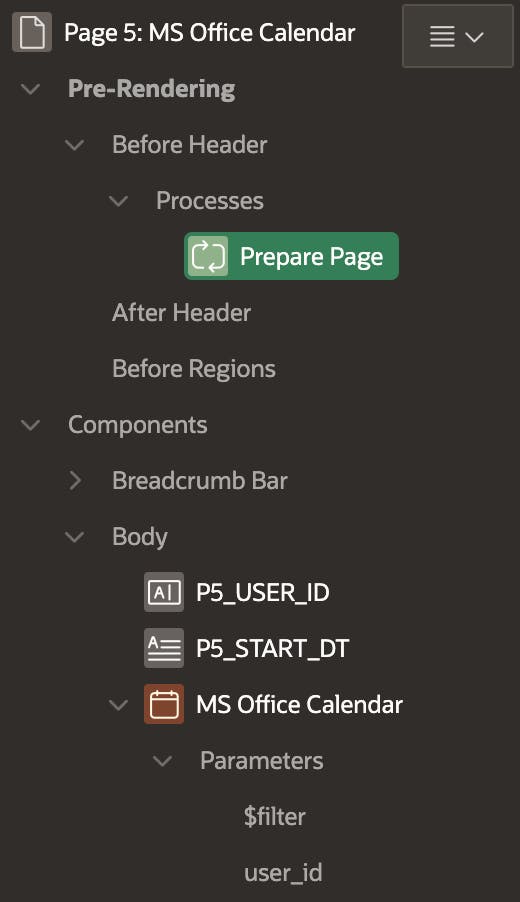
- Add a 'Before Header' process to default values for these parameters

- The final page structure should look something like this
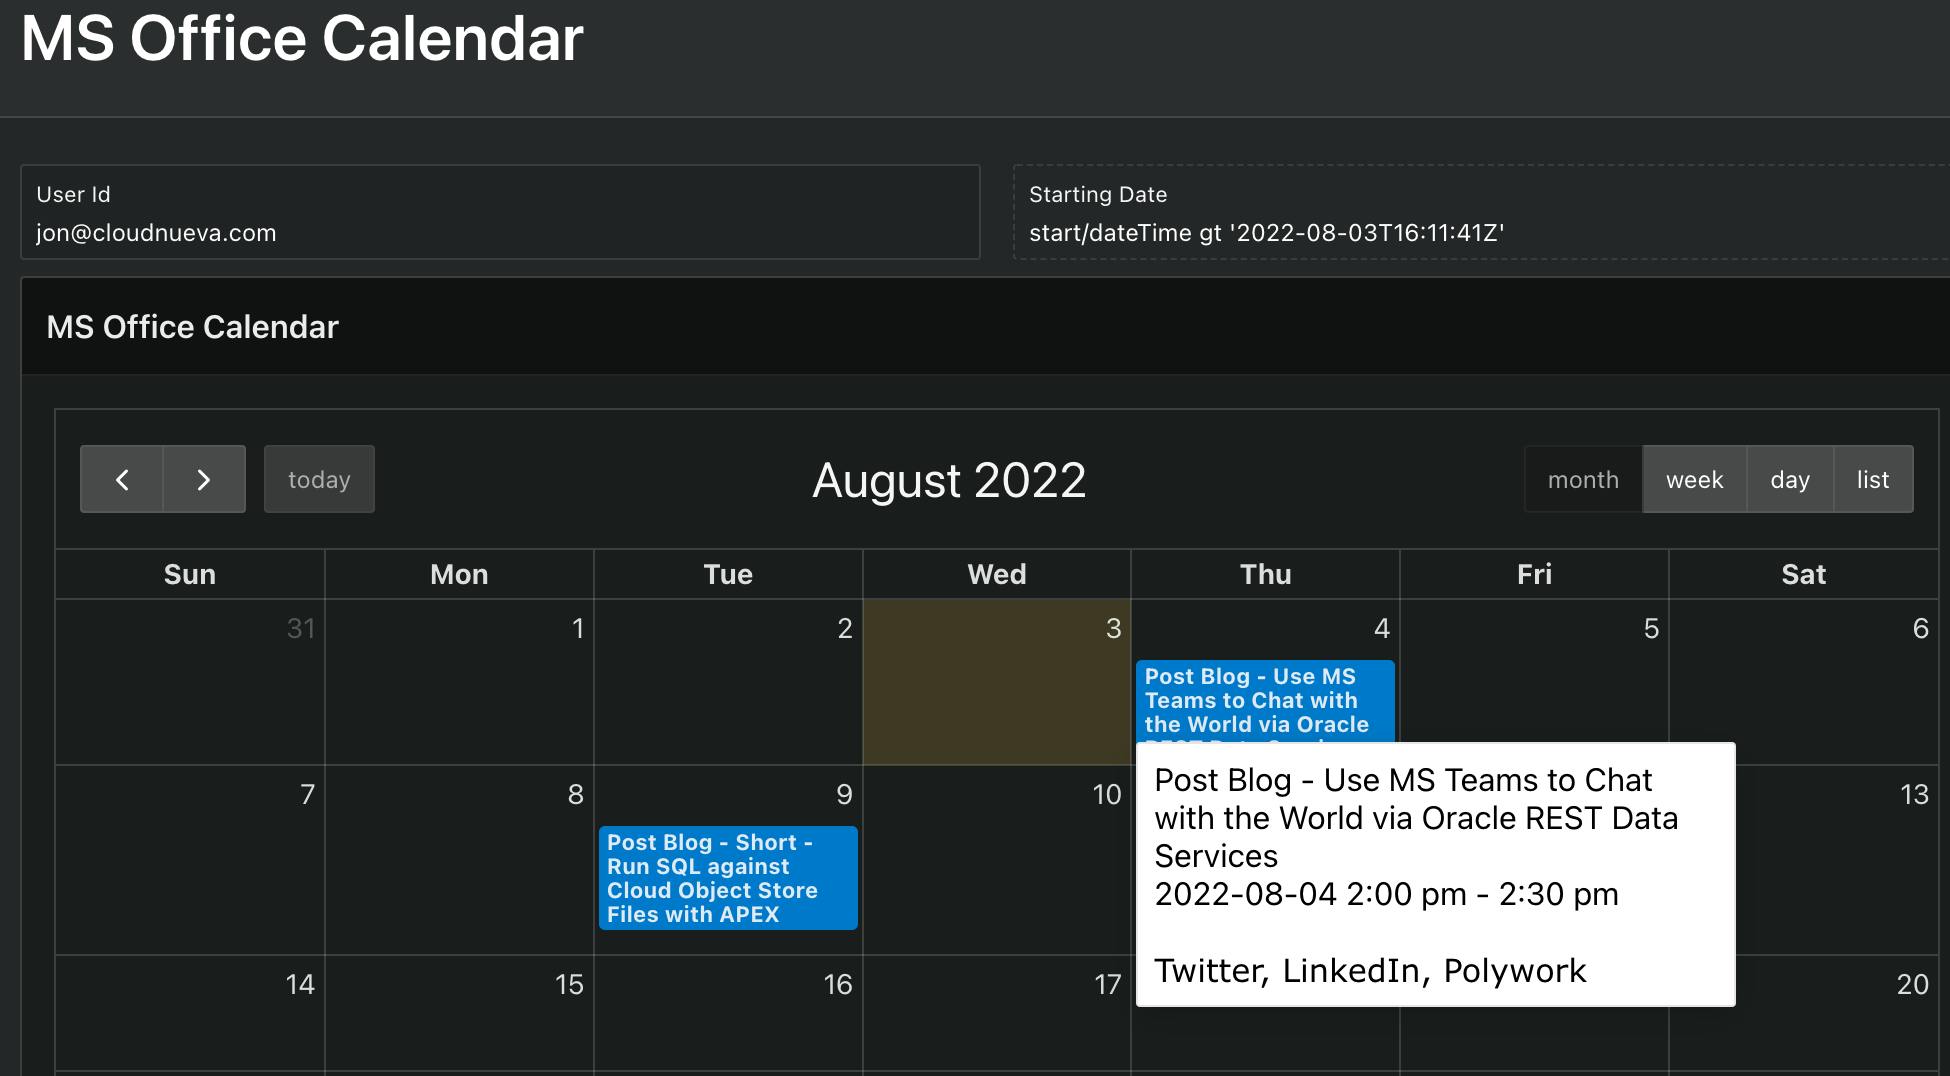
- Finally, run the page, and it should look something like this:
Conclusion
In this post, I showed you how to integrate Office 365 calendar entries into an Oracle APEX Calendar region with just two lines of code. I encourage you to explore further and begin integrating Office 365 services into your APEX applications.

