In this short, I will show you how to configure secure access between Oracle APEX and Oracle Cloud Infrastructure (OCI) Object Storage. This access allows your APEX applications and PL/SQL code to securely GET, DELETE and POST files from/to OCI Object Storage. I will be using this secure access in subsequent blog posts.
This post assumes you have an Oracle Cloud account. Everything I do in this post is available on the OCI Always Free Tier, so it will not cost you anything.
❗If you are storing files (images, pdfs, etc.) in BLOBs in the database, then stop. Storing files in Object Storage is cheaper and reduces the size of your database for backups to speed up backups, clones, etc.
Oracle Cloud Configurations
Use the OCI Console to perform the steps in this section.
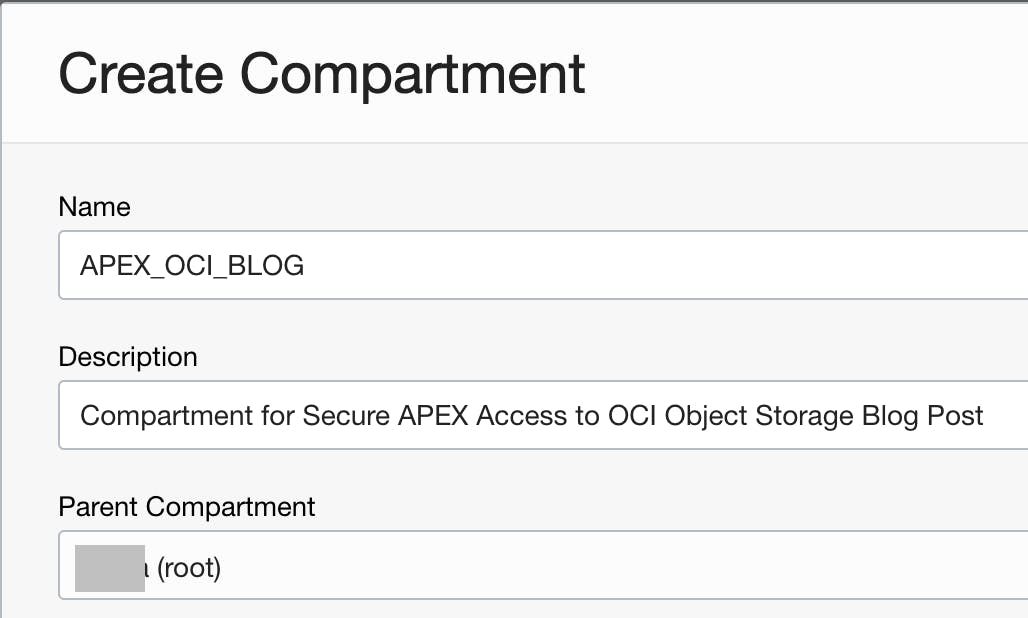
Create a Compartment
Compartments allow you to secure related OCI resources.
🧭 Identify & Security > Compartment > Click 'Create Compartment'
Create an Object Store Bucket
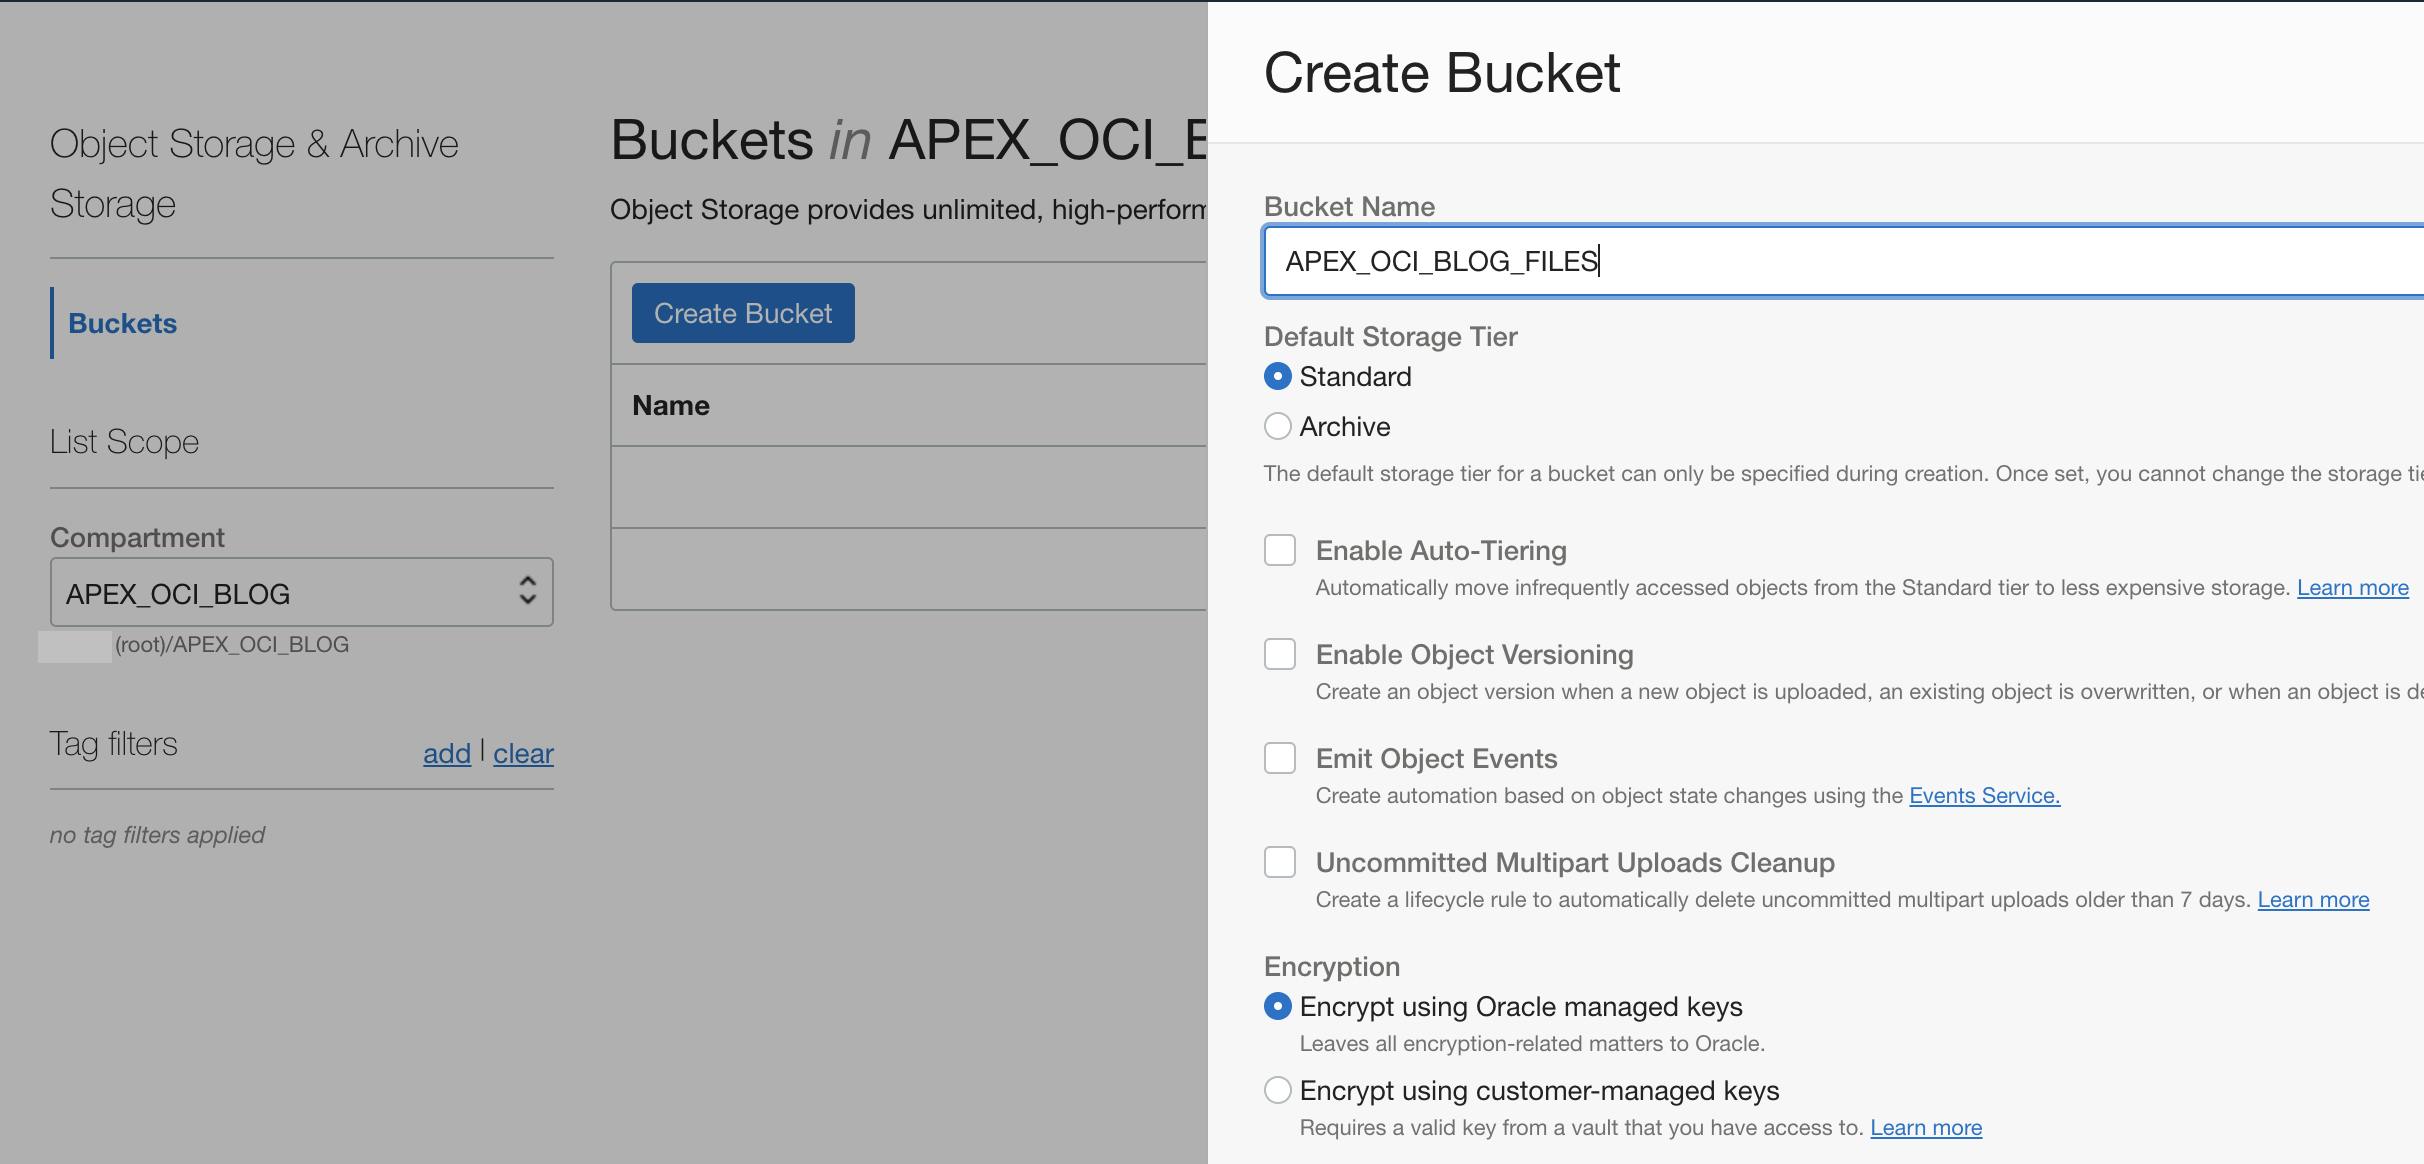
Buckets are containers for your files.
🧭 Storage > Object Storage & Archive > Buckets
On the left side, select the compartment you created above
Click 'Create Bucket', enter a name and click 'Create'
Create Service Account
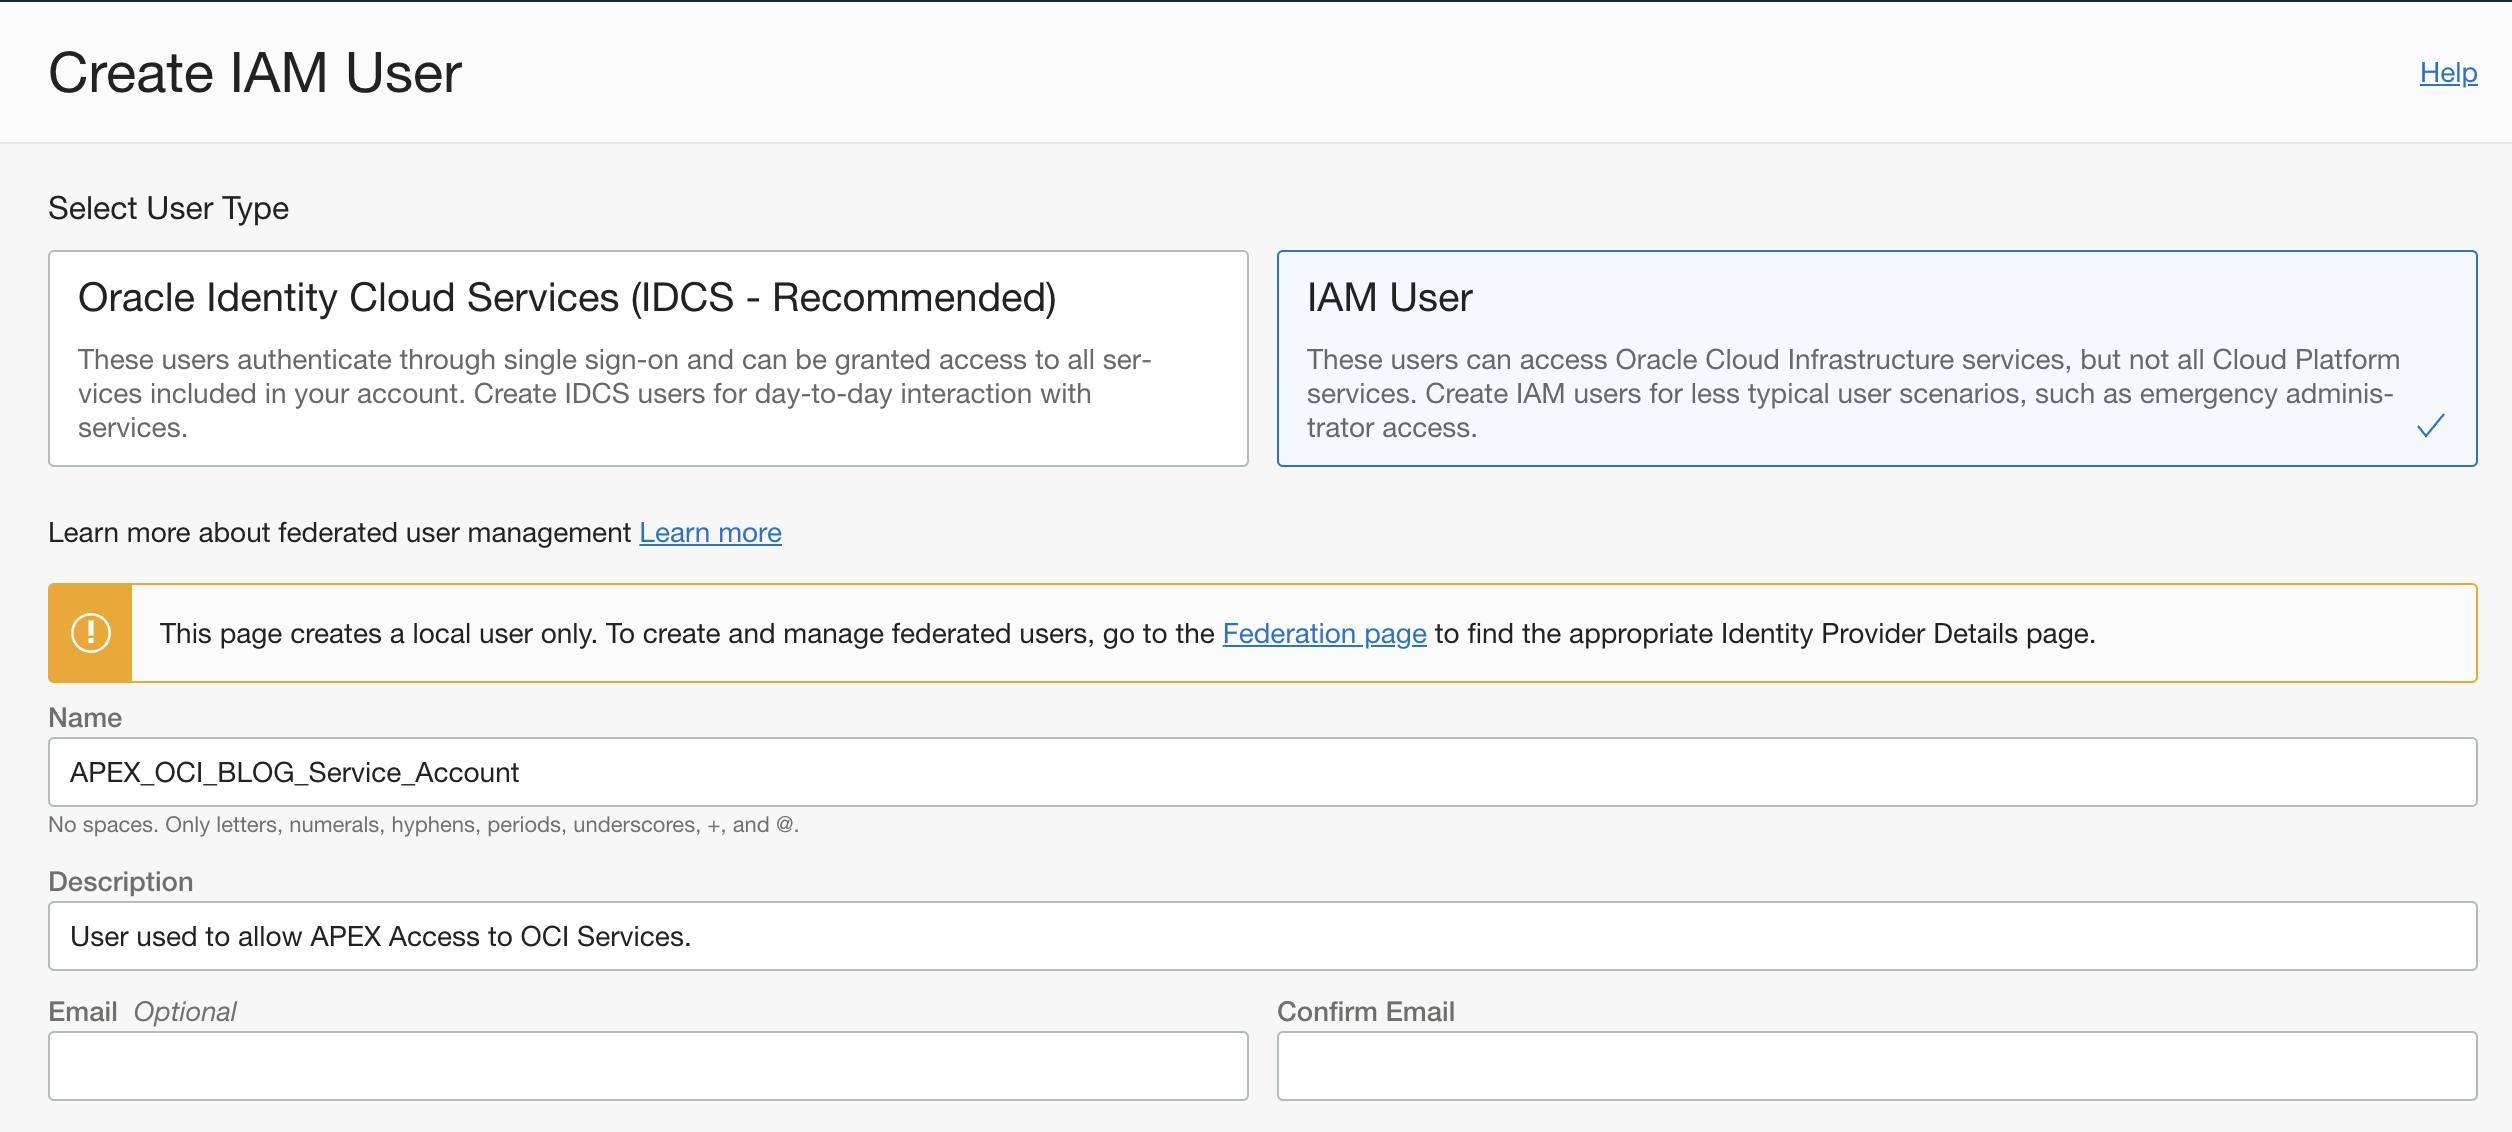
The 'Service Account' will be used to authenticate into OCI.
🧭 Identify & Security > Users > Click 'Create User'
Select 'IAM User', then enter a 'Name' and 'Description'
Click 'Create'
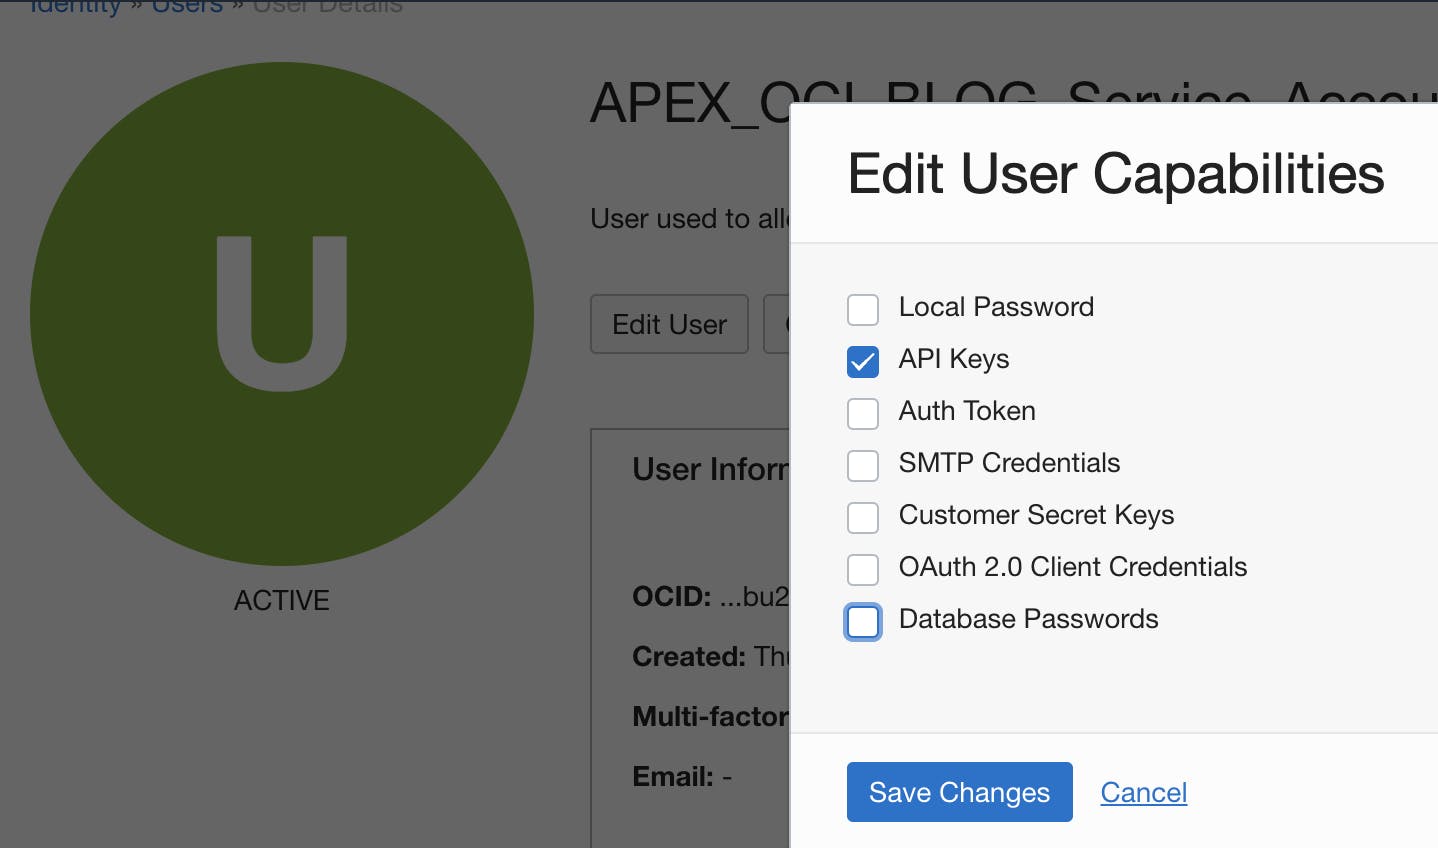
Click 'Edit User Capabilities' and uncheck all options, except 'API Keys'
Click on the 'API Keys' link, then click 'Add API Key'
Select 'Generate API Key Pair', then click 'Download Private Key' and 'Download Public Key'
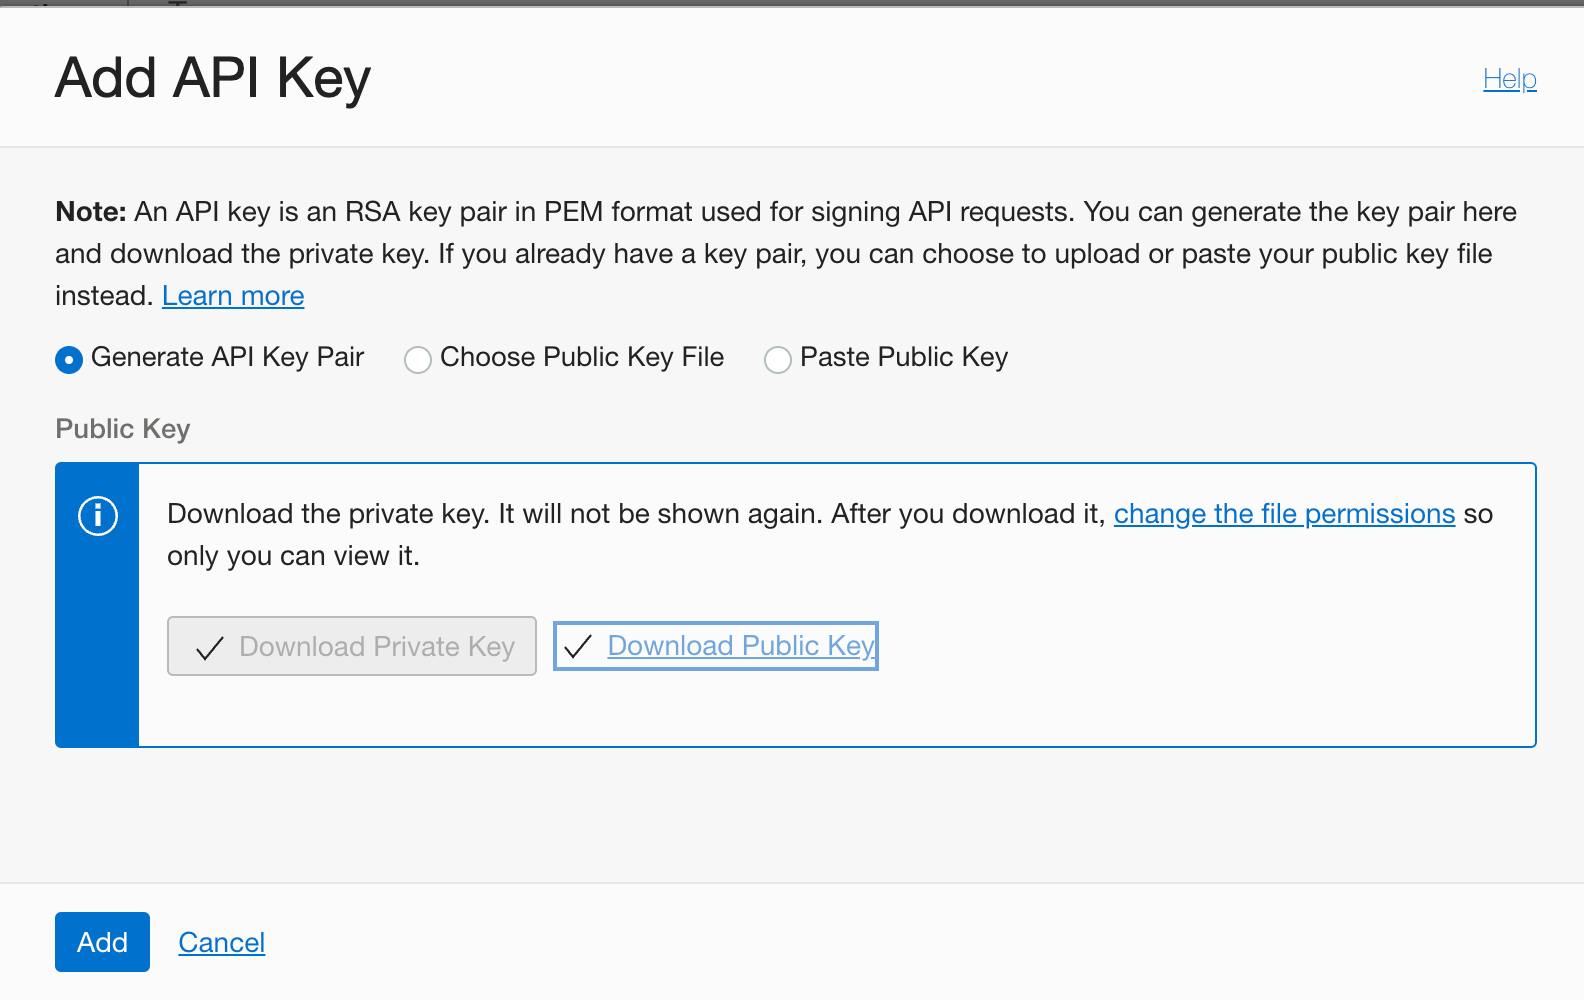
💾 Save the two downloaded files, then click 'Add'
✏️ Take note of the values for
user,fingerprintandtenancy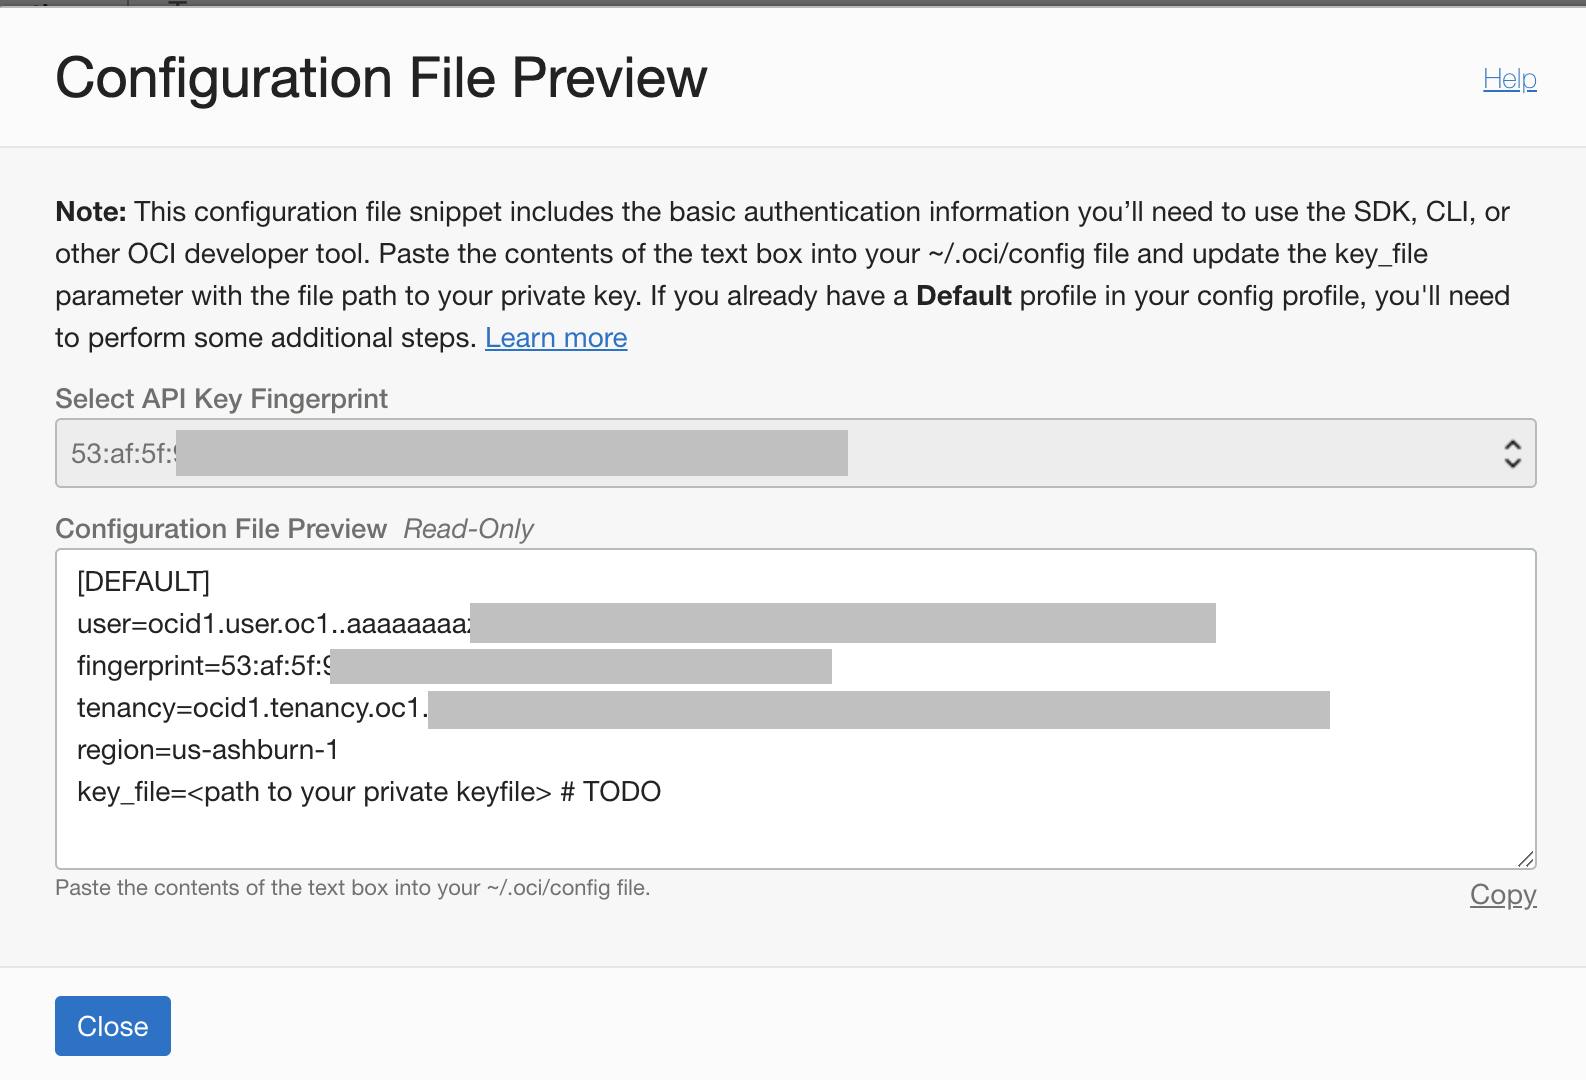
Create a Security Group
Security Groups allow you to assign policies to groups of users.
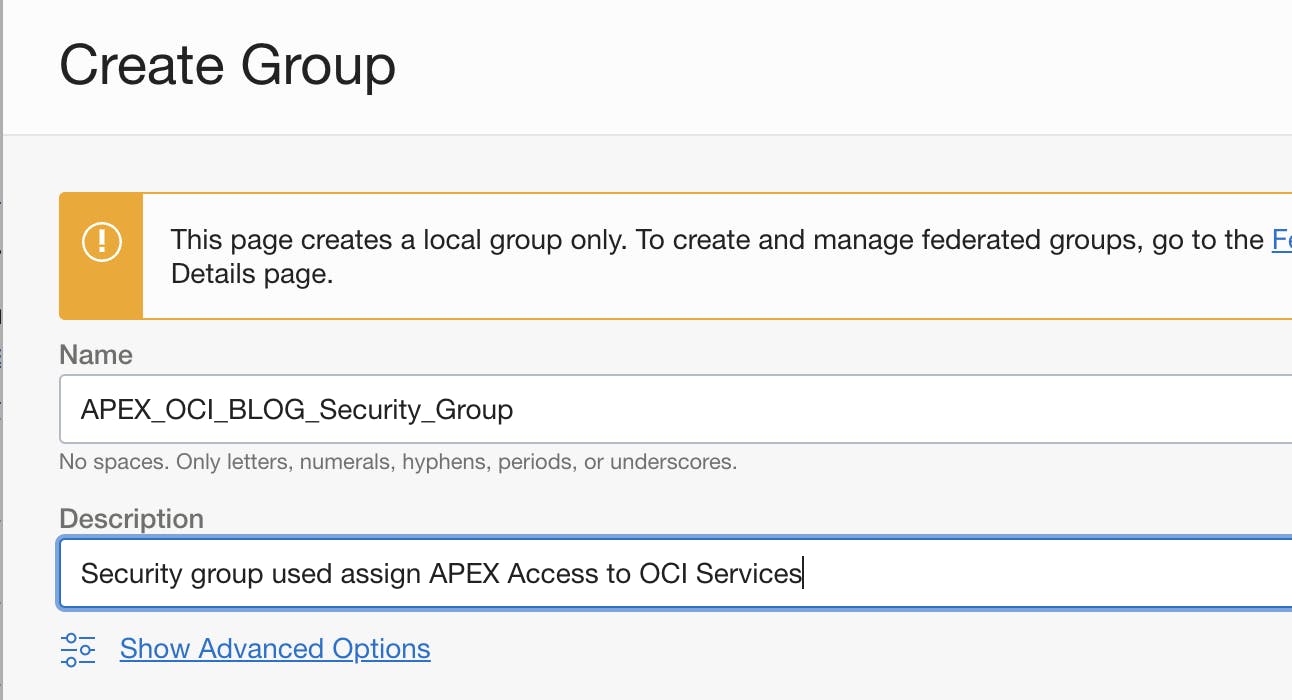
🧭 Identify & Security > Groups > Click 'Create Group'
Enter a name and description, then click 'Create'
Under Group Members, click 'Add User to Group'
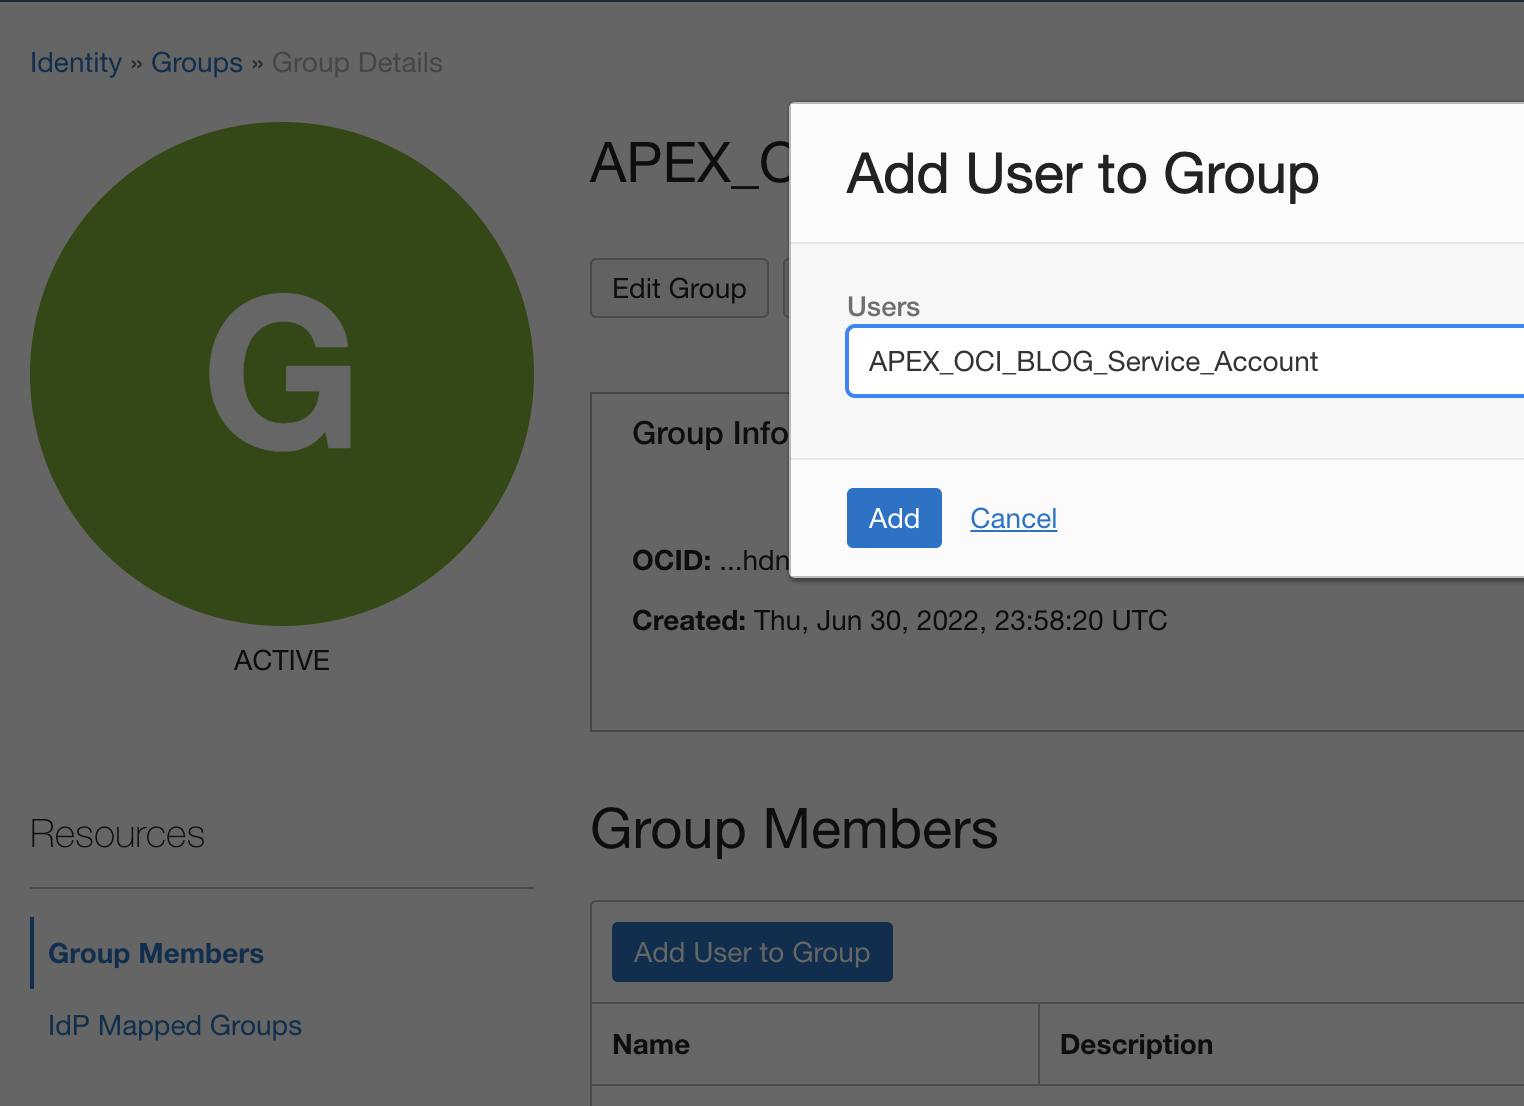
Select the User you just created, then click 'Add'
Create a Security Policy
Security policies specify what access the Security Group has to our OCI Bucket.
🧭 Identify & Security > Identity > Policies
Click 'Create Policy'
Enter a Name and Description
Select the Compartment created above
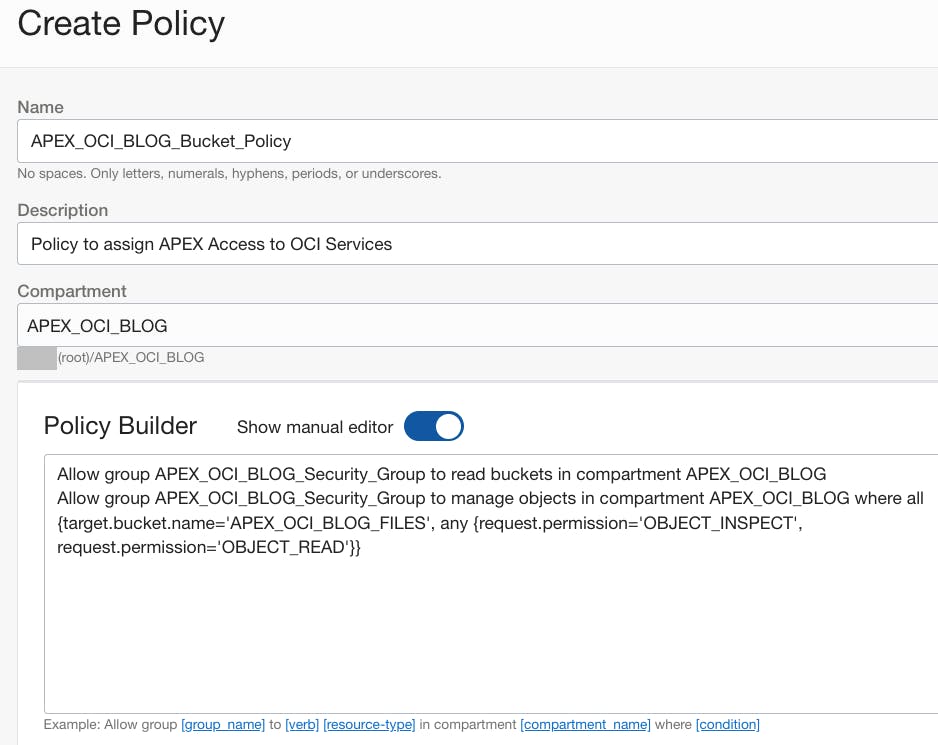
Turn on the 'Show manual editor' switch
Enter the following statements (using the Security Group, Compartment and Bucket created above). The rules below allow read and write access to the bucket
APEX_OCI_BLOG_FILES. Read the documentation for more policy examples
Allow group APEX_OCI_BLOG_Security_Group to read buckets in compartment APEX_OCI_BLOG
Allow group APEX_OCI_BLOG_Security_Group to manage objects in compartment APEX_OCI_BLOG where all {target.bucket.name='APEX_OCI_BLOG_FILES', any {request.permission='OBJECT_CREATE', request.permission='OBJECT_INSPECT', request.permission='OBJECT_READ',request.permission='OBJECT_OVERWRITE'}}
Click 'Create'
Completed Security Policy Page:
Oracle APEX Web Credential
The APEX Web Credential will be used to authenticate against OCI Object store from APEX components and the APEX_WEB_SERVICE PL/SQL API.
❗Most of the values entered below come from the 'Create Service Account' section above.
Login to APEX Builder
🧭 Workspace Utilities > Web Credentials > Click 'Create > '
Screenshot showing completed Web Credential Page:
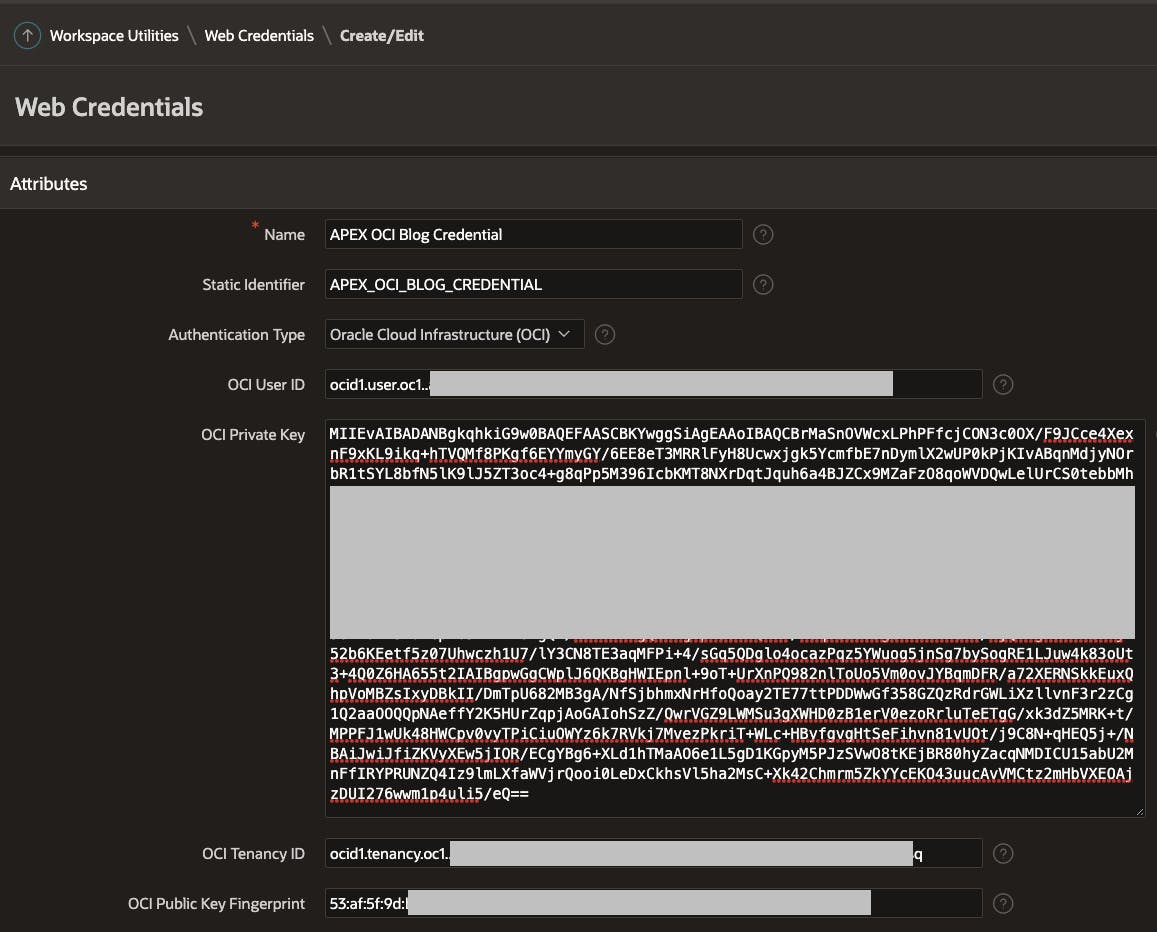
Enter a 'Name' and 'Static Identifier'
Select 'Authentication Type' =
Oracle Cloud Infrastructure (OCI)'OCI User ID' = Enter the
uservalue; this starts withocid1.userFor 'OCI Private Key', complete the following steps:
- Open the file downloaded when you clicked the 'Download Private Key' button while creating the OCI Service Account. The content should look similar to the text below
-----BEGIN PRIVATE KEY-----
MIIEvAIBADANBgkqhkiG9w0BAQEFAASCBKYwggSiAgEAAoIBAQCBrMaSnOVWcxLP
hPFfcjCON3c0OX/F9JCce4XexnF9xKL9ikq+hTVQMf8PKgf6EYYmyGY/6EE8eT3M
RRlFyH8Ucwxjgk5YcmfbE7nDymlX2wUP0kPjKIvABqnMdjyNOrbR1tSYL8bfN5lK
AjzDUI276wwm1p4uli5/eQ==
-----END PRIVATE KEY-----
Delete the first line
-----BEGIN PRIVATE KEY-----and the last line-----END PRIVATE KEY-----Remove all line feeds so that the text is just one continuous string
Paste the string into the 'OCI Private Key' field
'OCI Tenancy ID' = Enter the
tenancyvalue; this starts withocid1.tenancy'OCI Public Key Fingerprint' = Enter the
fingerprintvalue; e.g.e0:3b:eb:d6:cc:c2:ae:5e:3f:b0:45:09:ac:d6:14:f5
Testing the Web Credential
Upload a test file to the OCI Bucket created above; in my example, the bucket name is
APEX_OCI_BLOG_FILESI uploaded a file accessible at this URL
https://objectstorage.us-ashburn-1.oraclecloud.com/n/XXXX/b/APEX_OCI_BLOG_FILES/o/Sample_File.json. Note: XXXX is the tenancy name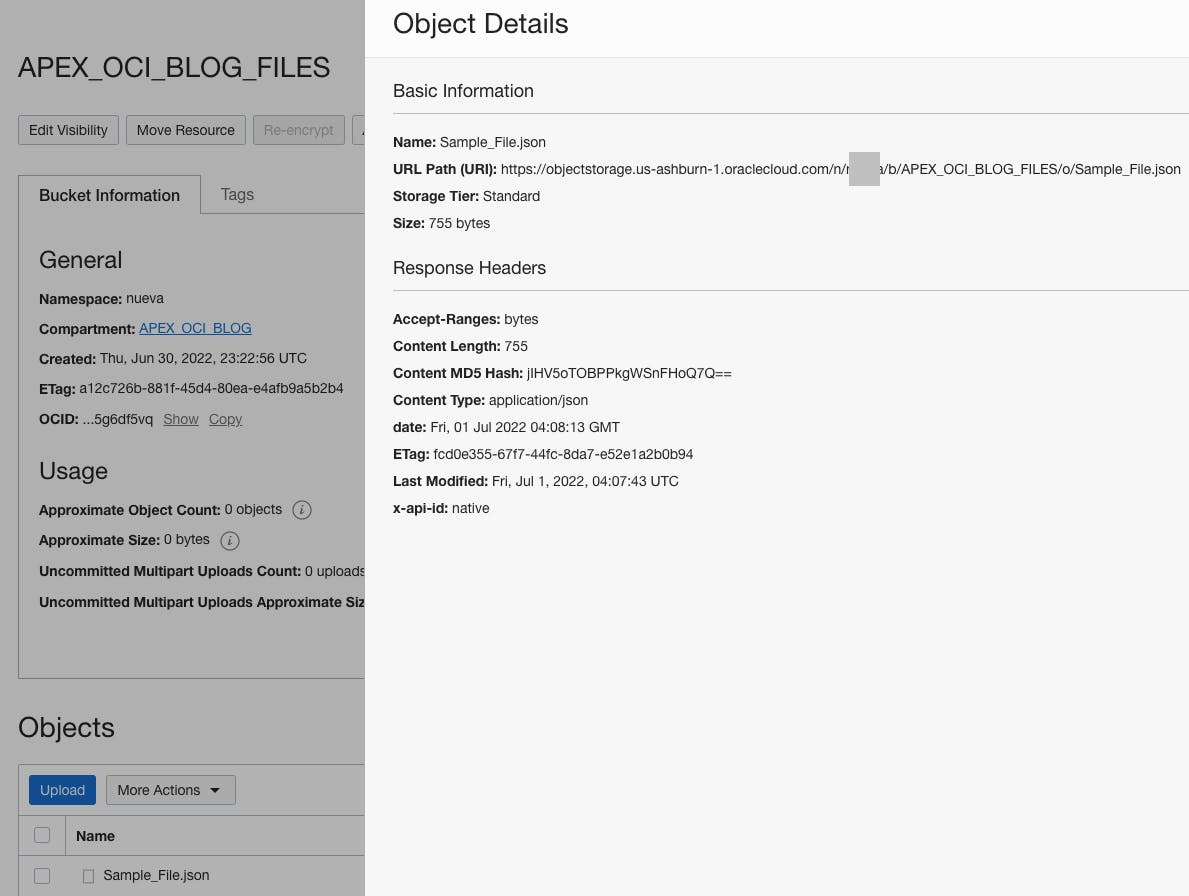
Using SQL Developer, log in to the parsing schema for the Workspace where the Web Credential was created
Change the URL as appropriate for your region and tenant, then run the following SQL. This SQL will return the size in bytes of the file you uploaded. Do a quick check to make sure the number of bytes matches.
SELECT dbms_lob.getlength
        (apex_web_service.make_rest_request_b
         (p_url => 'https://objectstorage.us-ashburn-1.oraclecloud.com/n/XXXX/b/APEX_OCI_BLOG_FILES/o/Sample_File.json',
          p_http_method => 'GET',
          p_credential_static_id => 'APEX_OCI_BLOG_CREDENTIAL')) file_size
FROM   dual;
- You can run the following SQL to get the actual file:
SELECT apex_web_service.make_rest_request_b
        (p_url => 'https://objectstorage.us-ashburn-1.oraclecloud.com/n/XXXX/b/APEX_OCI_BLOG_FILES/o/Sample_File.json',
         p_http_method => 'GET',
         p_credential_static_id => 'APEX_OCI_BLOG_CREDENTIAL') file_blob
FROM   dual;
Conclusion
With OCI security setup and the APEX Web Credential in place, you can now GET, PUT and DELETE files in OCI Object Store using the APEX_WEB_SERVICE PL/SQL API. You can also create APEX REST Data Sources against the OCI Object Store REST Services to access Object Store files from declarative APEX components.

