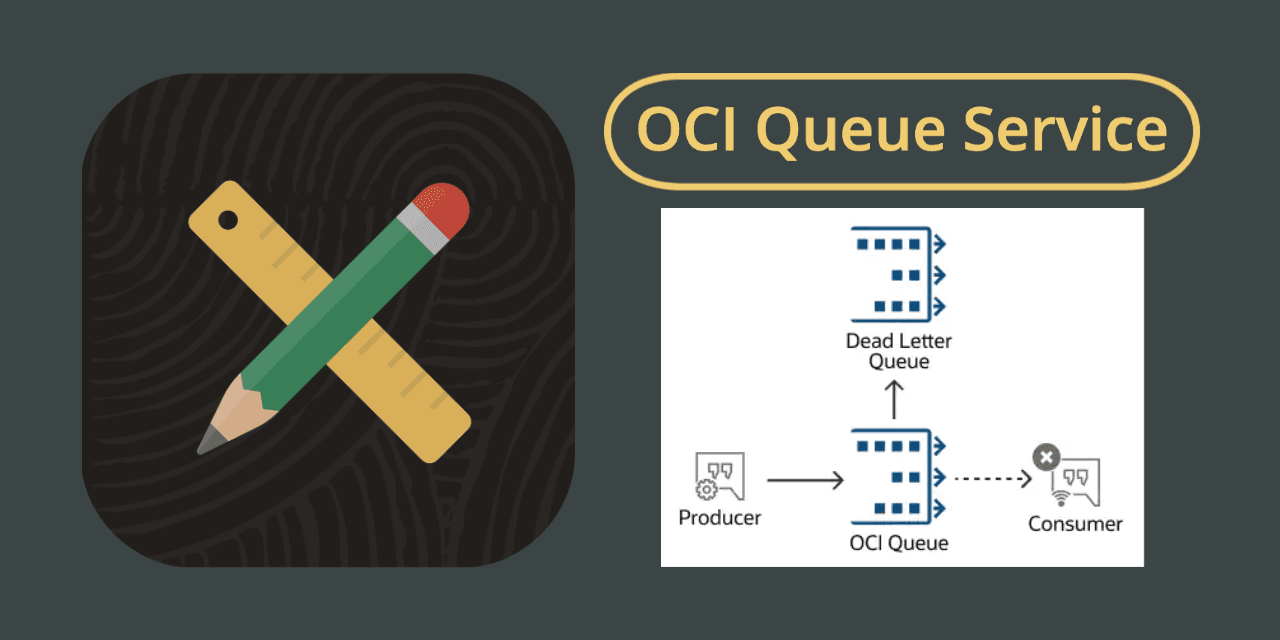
Setting up and Using the OCI Queue Service from APEX
Introduction
The Oracle Cloud Infrastructure (OCI) Queue Service was released toward the end of 2022. This post will tell you what a message queue is and what message queues can be used for. It will also deep dive into an example that will show you how to:
Set up and secure an OCI queue
Use REST APIs to post, consume and delete messages from an OCI queue
Integrate OCI Queue REST APIs with Oracle APEX
What is a Message Queue
A message queue acts as a buffer that stores messages temporarily and enables asynchronous communication between different system components, allowing them to run independently and potentially at different speeds.
Message queues are often used to decouple various parts of a system, allowing them to work independently and asynchronously.
Message queues can be used in various contexts, including distributed systems, microservices architectures, and cloud computing.
Overall, message queues provide a flexible and efficient way to exchange messages between different components of a system, helping to improve scalability, reliability, and performance.
OCI Queue Guarantees
The OCI Queue service provides the following guarantees.
A successfully published message is guaranteed to be durable until it's either deleted or its retention period has passed. The publication of a message is considered successful when the Queue service sends back an acknowledgment to the producer. It does not matter whether the response was received.
A message within the visibility timeout is guaranteed not to be delivered to another consumer until that timeout expires.
The Queue service will not delete a message before its retention period is over. A consumer can process and delete a message during its retention period.
Queue Use Cases
Asynchronous communication: Message queues can facilitate communication between different parts of a system that operate at different speeds or on different schedules. Using a message queue, slower components can process messages at their own pace without blocking faster components.
Decoupling: Message queues allow different system components to communicate without being directly connected, which can help decouple the components and make the overall system more modular and flexible.
Load balancing: Message queues can be used to distribute incoming requests or tasks among multiple workers, helping to balance the workload and improve overall system performance.
Reliability: Message queues can store messages temporarily if a component is unavailable or experiencing issues, helping to ensure that messages are not lost and that the system can recover more easily from failures.
Microservices architectures: In a microservices architecture, message queues can facilitate communication between different services, allowing them to operate independently and be scaled up or down as needed.
Queue Examples
Integrations: You can use queues to integrate data between instances. Source instances post messages to the Queue, and target instances pull and consume them from the Queue.
Email/SMS: You could use a queue to post messages that need to be delivered via email or SMS. The email/SMS can pull messages from the Queue and send them out.
Image Resizing: When posting images to OCI Object Storage, you can add the URL for images to an OCI Queue. An image resizing service can then poll the queue and resize messages.
OCI Queue Documentation
OCI Queue Product Page
OCI Queue Overview
OCI Queue Security Policies
OCI Queue REST APIs
Blog Example
For this post, I will build a simplified example where I have one database that stores a master copy of all inventory items. Several child databases create and update local copies of items that need to get published to the master database.
We will create an OCI Queue called master_items that allows child instances to post item updates and the master instance to pull these updates from the Queue. An APEX page will illustrate the item creation/update from a child instance, and an APEX Automation will be used to show how these messages can be consumed.
Creating the Queue in OCI
If you are starting from scratch on OCI, there are five steps involved in creating a queue and being able to use it from an APEX App:
Create an OCI User Account (Service Account)
Create API Keys for the User Account
Create an APEX Web Credential using the OCI User Account
Create a Security Group and Add the User Account to the Security Group
Create the Queue
Create a Security Policy to allow users assigned to the Security Group access to add and remove items from the Queue
Please refer to my blog Secure APEX Access to OCI Object Storage, which describes how to complete steps 1, 2, 3, and 4. I will be focusing on steps 5 and 6 in this post.
Create the Queue
Login to the OCI console and navigate to Developer Services > Application Integration > Queues. Click 'Create queue'.
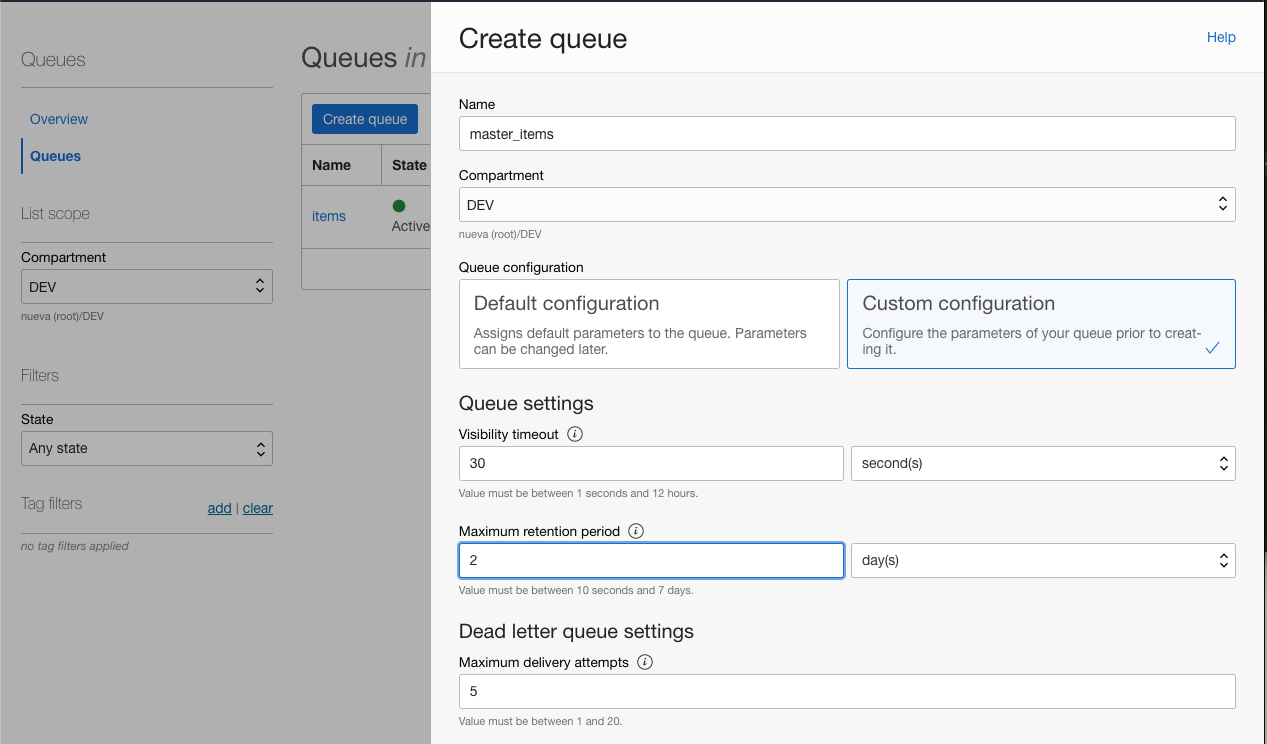
Name - Name for the Queue.
Compartment - Location/Compartment to create the Queue in.
Visibility timeout - When a consumer picks up a message, it is hidden from other consumers for the period identified in this field.
Maximum retention period - Maximum amount of time a message should be kept in the Queue until it is deleted.
Dead letter queue settings - Consumers are responsible for deleting messages from the Queue once they pick them up. The message can be picked up again if they don't do this. This field represents the number of times consumers can pick up a message before it is moved to the Dead Letter Queue (DLQ).
Click 'Create' to create the Queue. This typically takes less than a minute. After which, you can see the details of the Queue.
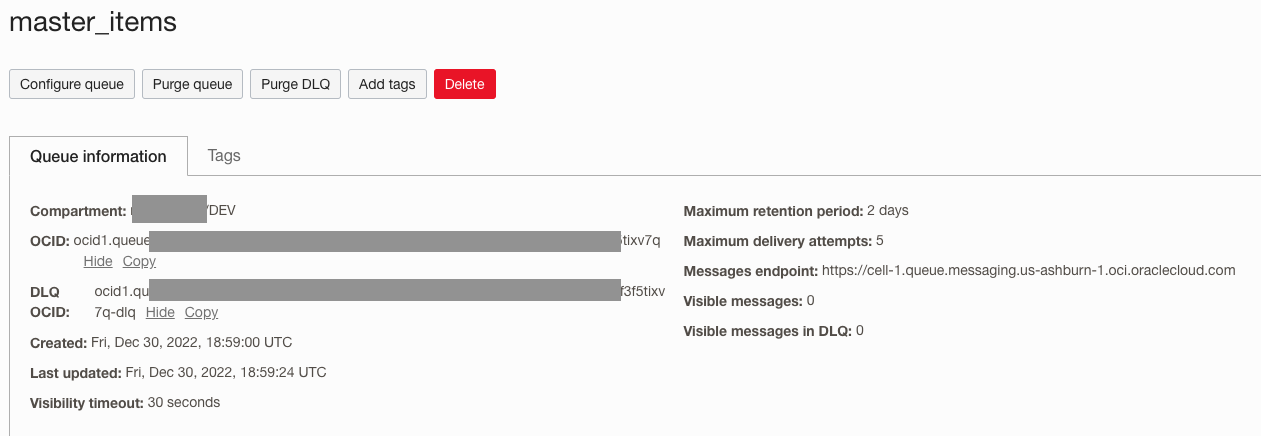
Take note of the following:
OCID- This is the Queue ID, which we will reference in the REST API calls below.DLQ OCID- This is the ID of the Dead Letter Queue.Messages endpoint- This is the<BaseURL>for the REST API calls below.
Security Policies
Now that we have created a Queue, we need to create a security policy so that we can call the Queue REST APIs. I will re-use the Security Group 'APEX_OCI_BLOG_Security_Group' and the Service Account 'APEX_OCI_Blog_Service_Account' I created in my previous post Secure APEX Access to OCI Object Storage.
Navigate: Identity & Security > Identity > Policies, then click 'Create Policy'. Complete the security policy as described below.
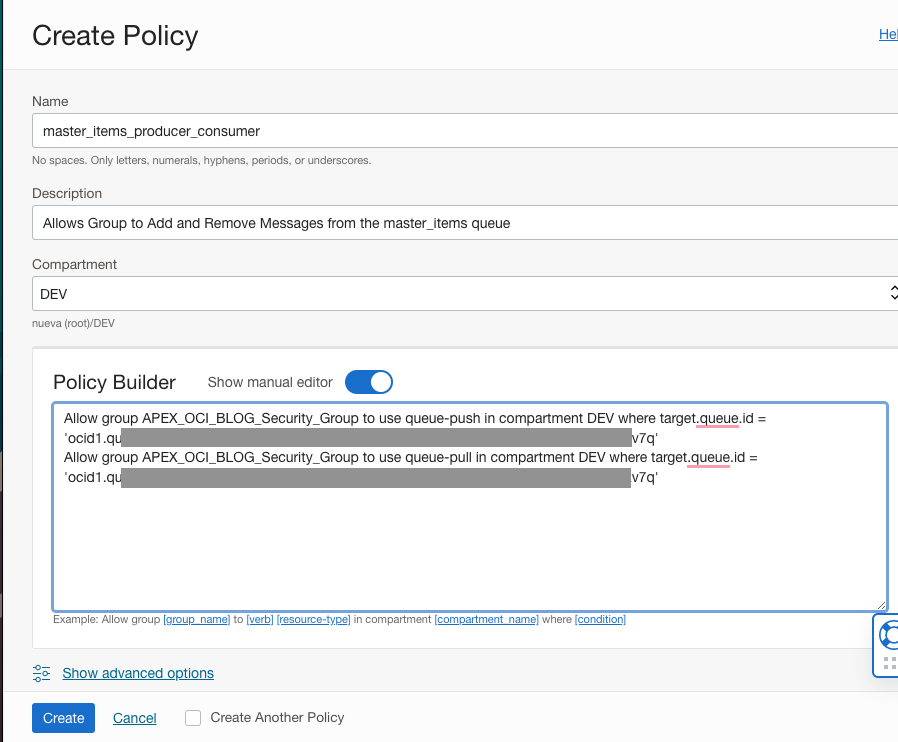
Allow group APEX_OCI_BLOG_Security_Group to use queue-push in compartment DEV where target.queue.id = '<Queue_OCID>'
Allow group APEX_OCI_BLOG_Security_Group to use queue-pull in compartment DEV where target.queue.id = '<Queue_OCID>'
Read the documentation for more on Queue Policies.
Note: The where target.queue.id = clause limits the scope of the policy to the Queue we just created.
Note: In the example above, I created a single policy allowing users in the Group APEX_OCI_BLOG_Security_Group to add and remove messages from the Queue. You may want to create separate service accounts, groups, and policies for queue producers Vs. queue consumers. That way, consumers can only fetch messages, and producers can only post messages.
Testing from Postman
Before you can test any OCI REST APIs from Postman, you will first need to create a Postman Environment to handle OCI Authentication. You can learn how to do this from my post on OCI Document AI.
To complete an entire message cycle, we need to be able to add messages, fetch messages and delete messages from the Queue. In this section, I will cover three REST APIs that do this.
Add Messages to the Queue
We are posting new and updated inventory items to the Queue in the example. The JSON for an item object that we want to integrate looks like this:
{
  "item_number": "R100001",
  "item_description": "Apple Keyboard",
  "country_of_mfg": "US",
  "category_code": "PTO"
}
You can post anything to a queue, with a limit of 128 KB per individual message and a limit of 512 KB and 20 messages per message POST request. Read the documentation for more on the Service Limits of the Queue Service. In our case, we want to post the above item JSON. To post this JSON, we need to escape our JSON and embed it in the payload of the PutMessages REST API.
Example Payload for the PutMessages API, showing two items:
{
  "messages": [
    {
      "content": "{\r\n  \"item_number\": \"R100001\",\r\n  \"item_description\": \"Apple Keyboard\",\r\n  \"country_of_mfg\": \"US\",\r\n  \"category_code\": \"PTO\"\r\n}"
    },
    {
      "content": "{\r\n  \"item_number\": \"R100002\",\r\n  \"item_description\": \"Apple Mouse\",\r\n  \"country_of_mfg\": \"US\",\r\n  \"category_code\": \"PTO\"\r\n}"
    }
  ]
}
The complete Postman request looks like this:

Method
POSTURL
<MessageEndPoint>/20210201/queues/<OCID>/messagesWhere
<MessageEndPoint>is the Messages endpoint from the Queue Definition, and<OCID>is the OCID from the Queue Definition
HTTP Headers
- Content-Type =
application/json
- Content-Type =
Payload
messagesis an array of one or more messages.contentIs an object which contains the payload you want to add to the Queue. This can be any text, it does not have to be JSON.
Response
The API returns a list of messages created on the Queue along with the IDs of these messages. Example Response JSON from the above request:
{
  "messages": [
    {
      "id": 67553994410557453,
      "expireAfter": "2022-12-31T19:42:59.876Z"
    },
    {
      "id": 67553994410557454,
      "expireAfter": "2022-12-31T19:42:59.876Z"
    }
  ]
}
Here is what the above messages look like when viewed from the Queue in the OCI Console. You can see that the Queue has the JSON within the content object for each message.

Consume Messages from the Queue
The GetMessages REST API is used to get 'visible' messages from the Queue.
Note: If another consumer had fetched a message, the message would not be visible to another request until the 'Visibility timeout' period has elapsed (assuming the other consumer does not delete the message).

Method
GETURL
<MessageEndPoint>/20210201/queues/<OCID>/messagesWhere
<MessageEndPoint>is the Messages endpoint from the Queue Definition, and<OCID>is the OCID from the Queue Definition
HTTP Headers
- Content-Type =
application/json
- Content-Type =
Parameters
In the above example, I am passing the
limitparameter to fetch up to 10 items from the Queue. It may be advantageous to fetch more than one record at a time (the default) to avoid round trips. When deciding the number of messages to fetch, you need to be aware of the service limits on GetMessages, which were 2 MB and 20 messages at the time of writing.For details on other parameters, see the GetMessages REST API documentation.
Example Response
{
  "messages": [
    {
      "id": 67553994410557453,
      "content": "{\r\n  \"item_number\": \"R100001\",\r\n  \"item_description\": \"Apple Keyboard\",\r\n  \"country_of_mfg\": \"US\",\r\n  \"category_code\": \"PTO\"\r\n}",
      "receipt": "AcmlVuQjRcSAAUhxcQzW8fGZ6lsLn_mAahBzLavAZlNfxDubLq8At6f0-71vVuVo8mZbQ1w2WXRwN-WQ4hrJgs_oayUzf3nLgNjNmK-kw_p5QyC50fjMDsCriAx70DnwH-WIaULvobGDzzJWMO5KorpBurknZWAHt437GFS9eYWb8BWGtyRYD4WPHoiOLMk2I0pvXvapUVdqw2tLnop8s4MXJoEEj5qtRpjb",
      "deliveryCount": 2,
      "visibleAfter": "2022-12-30T19:56:10.872Z",
      "expireAfter": "2022-12-31T19:42:59.876Z"
    },
    {
      "id": 67553994410557454,
      "content": "{\r\n  \"item_number\": \"R100002\",\r\n  \"item_description\": \"Apple Mouse\",\r\n  \"country_of_mfg\": \"US\",\r\n  \"category_code\": \"PTO\"\r\n}",
      "receipt": "AcmlVuQjRcSAAUhxclFHL32gHWIxEaZWzxlcfrC5euVC6ieRpgv3xgHljeEH96-BBPcvgK92I2AIqi17TKTtfLWFl64dJvcehSJh2sZ-H-Yxfh9H5CxH-4rc5sfN91biLa5ZZT_YqKWmnEV0W2lMkPIDcfj26fZ77oEHpTcFllgicgKB_Fh3ku6EwHtQFsZWv56ySpYep-eRz0Iuyge3O-8yvesjQudeUmWv",
      "deliveryCount": 2,
      "visibleAfter": "2022-12-30T19:56:10.872Z",
      "expireAfter": "2022-12-31T19:42:59.876Z"
    }
  ]
}
See the documentation for details on the response fields and what they mean.
You will need the value from the
receiptfield to delete the message once it has been consumed.
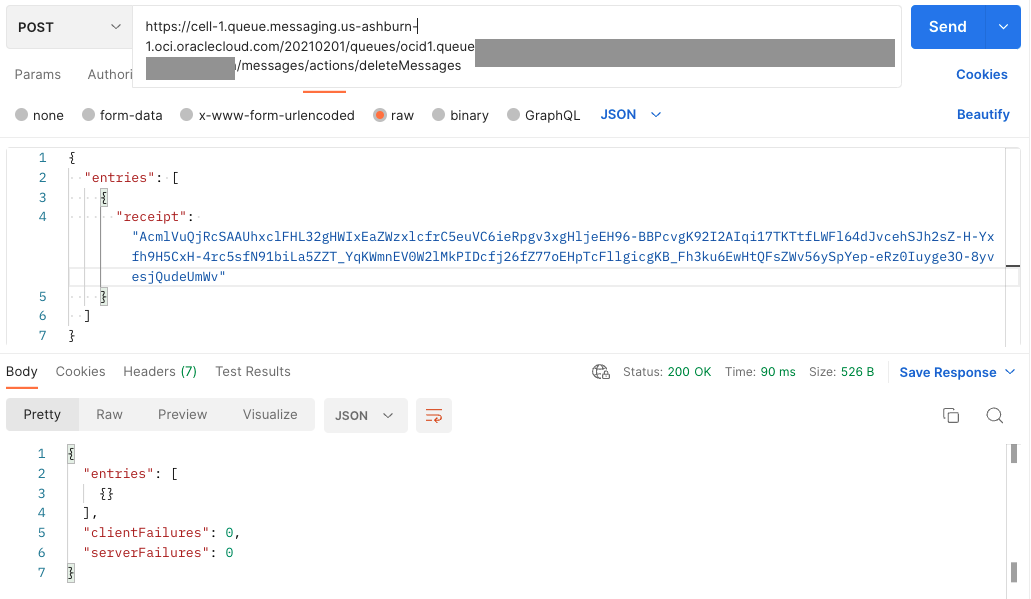
Delete Messages from the Queue
As a consumer of a message, once you have fetched it and consumed it, you need to then delete it, so it does not get picked up by another consumer.
The DeleteMessages API can delete one or more messages from a queue.
Method
POSTURL
<MessageEndPoint>/20210201/queues/<OCID>/messages/actions/deleteMessagesWhere
<MessageEndPoint>is the Messages endpoint from the Queue Definition, and<OCID>is the OCID from the Queue Definition
HTTP Headers
- Content-Type =
application/json
- Content-Type =
Payload
entries- An array of messages to delete.receipt- The receipt obtained when the messages were fetched.
There is also a singular version of the API DeleteMessage where you can delete one message at a time.
Note: If you try and delete a message that has expired or already been deleted, you will get an HTTP response of 200 OK and receive the error message in the response. e.g.
{
  "entries": [
    {
      "errorCode": 409,
      "errorMessage": "The message doesn't exist, has been deleted or has expired"
    }
  ],
  "clientFailures": 1,
  "serverFailures": 0
}
APEX Demonstration
In this section, I’ll show you how to add, consume and delete messages from a queue using PL/SQL and APEX. Here is what the completed demonstration looks like:
Adding Records from APEX
I have built a simple Interactive Grid to allow insert and update of records in the table DEMO_LOCAL_ITEMS.
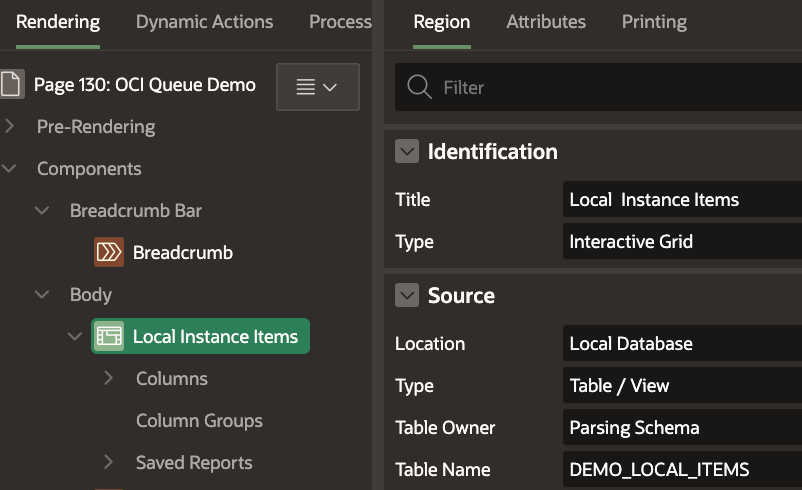
The Interactive Grid Process uses PL/SQL to insert/update records and then post messages to the OCI Queue with details of the created/updated items.
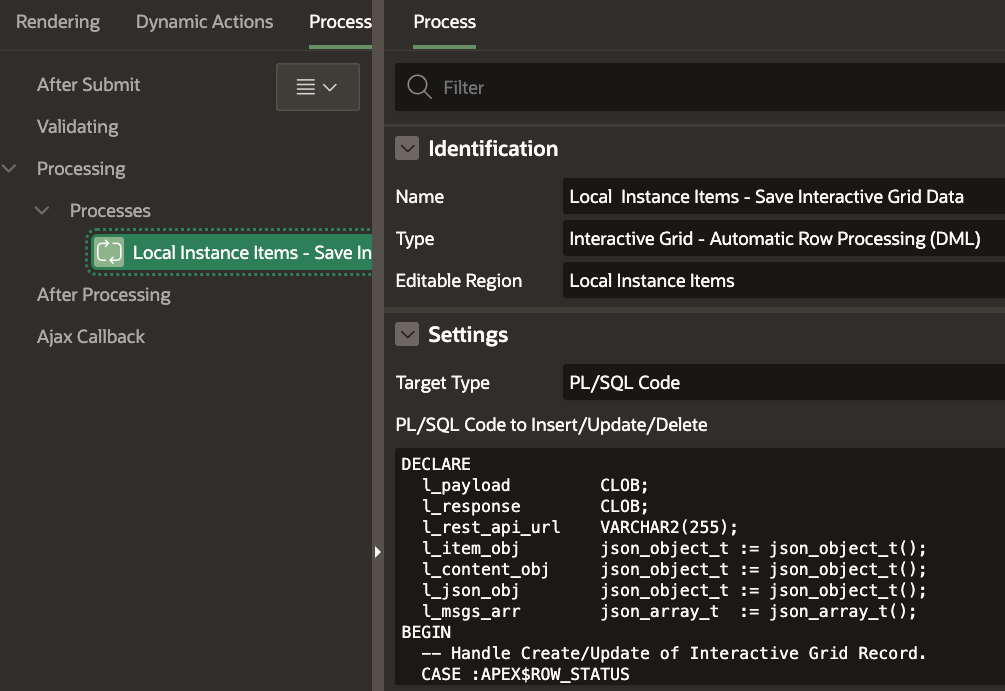
You can see the complete PL/SQL block below. I have included comments to describe what the code does. In real life, this code should be in a PL/SQL package/procedure.
Consuming Messages from APEX
I have created an APEX Automation to illustrate records consumption from the OCI Queue. The goal is to check the Queue for new messages every 15 minutes. Because we know the payload is small, we will fetch 20 records at a time from the Queue. As we consume a message, we will also add it to an array for deletion once processing is complete.
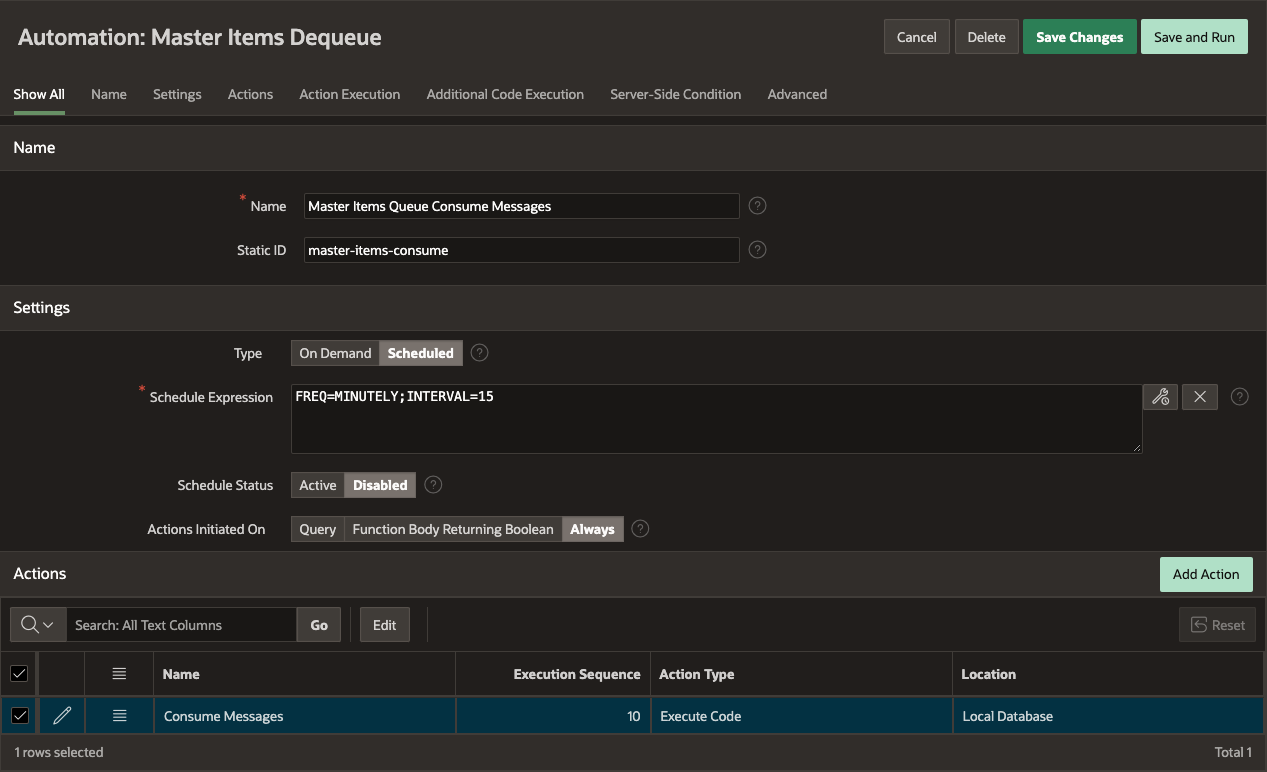
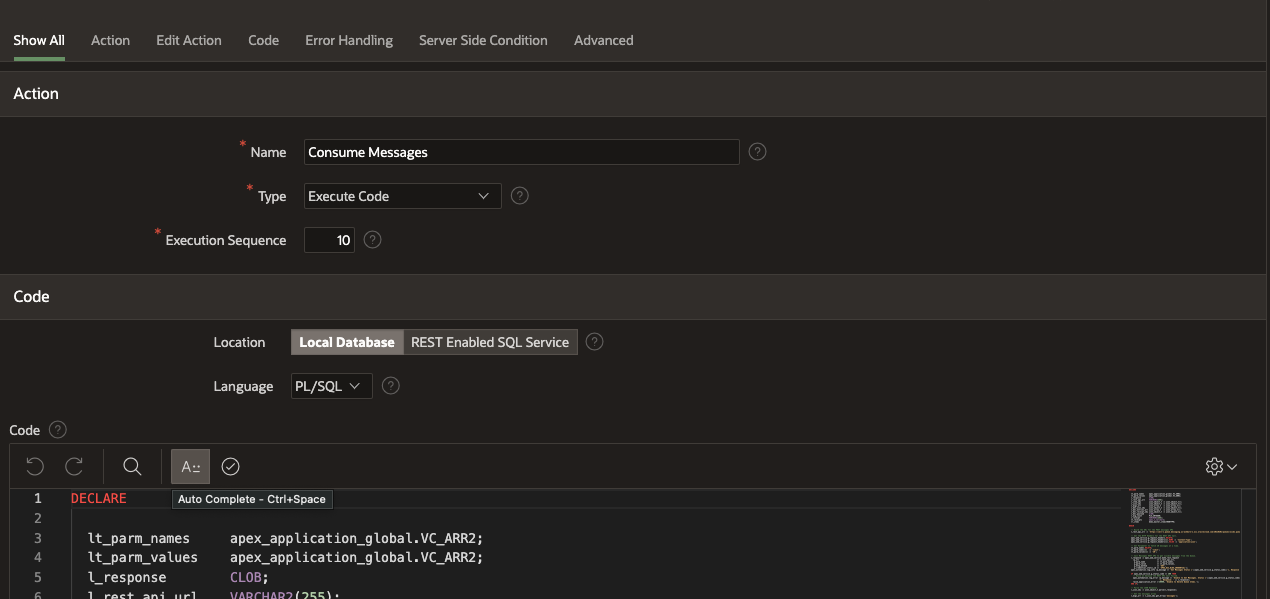
The complete PL/SQL code from the Automation Action 'Consume Messages' is here. I have included comments in the code to show what is going on.
Conclusion
In this post, I showed you how to configure and secure an OCI Queue. I also showed you how to add, consume and delete messages from an OCI Queue using the available REST APIs, Oracle APEX and PL/SQL.
Feel free to leave a comment on this post to let me know what you use queues for.